Email Octopus Integration
This guide will walk you through integrating Poper, your drag-and-drop popup builder, with EmailOctopus, a user-friendly email marketing platform. This integration allows you to effortlessly add leads captured through your Poper popups directly to your chosen EmailOctopus list, facilitating smooth email marketing campaigns.
Benefits of Integration:
- Automated List Building: Grow your email subscriber base effortlessly by automatically adding leads captured through your popups to your EmailOctopus list.
- Targeted Campaigns: Leverage EmailOctopus' segmentation features to create targeted email campaigns based on the data captured in your popups.
- Improved Engagement: Send timely and relevant email marketing messages to nurture leads captured through your popups and convert them into paying customers.
Prerequisites:
- A Poper account with an active popup campaign.
- An EmailOctopus account with an API key and a designated list for your leads.
Steps:
Access Your Poper Popup:
Open the Integrations Menu:
Find the EmailOctopus Integration: 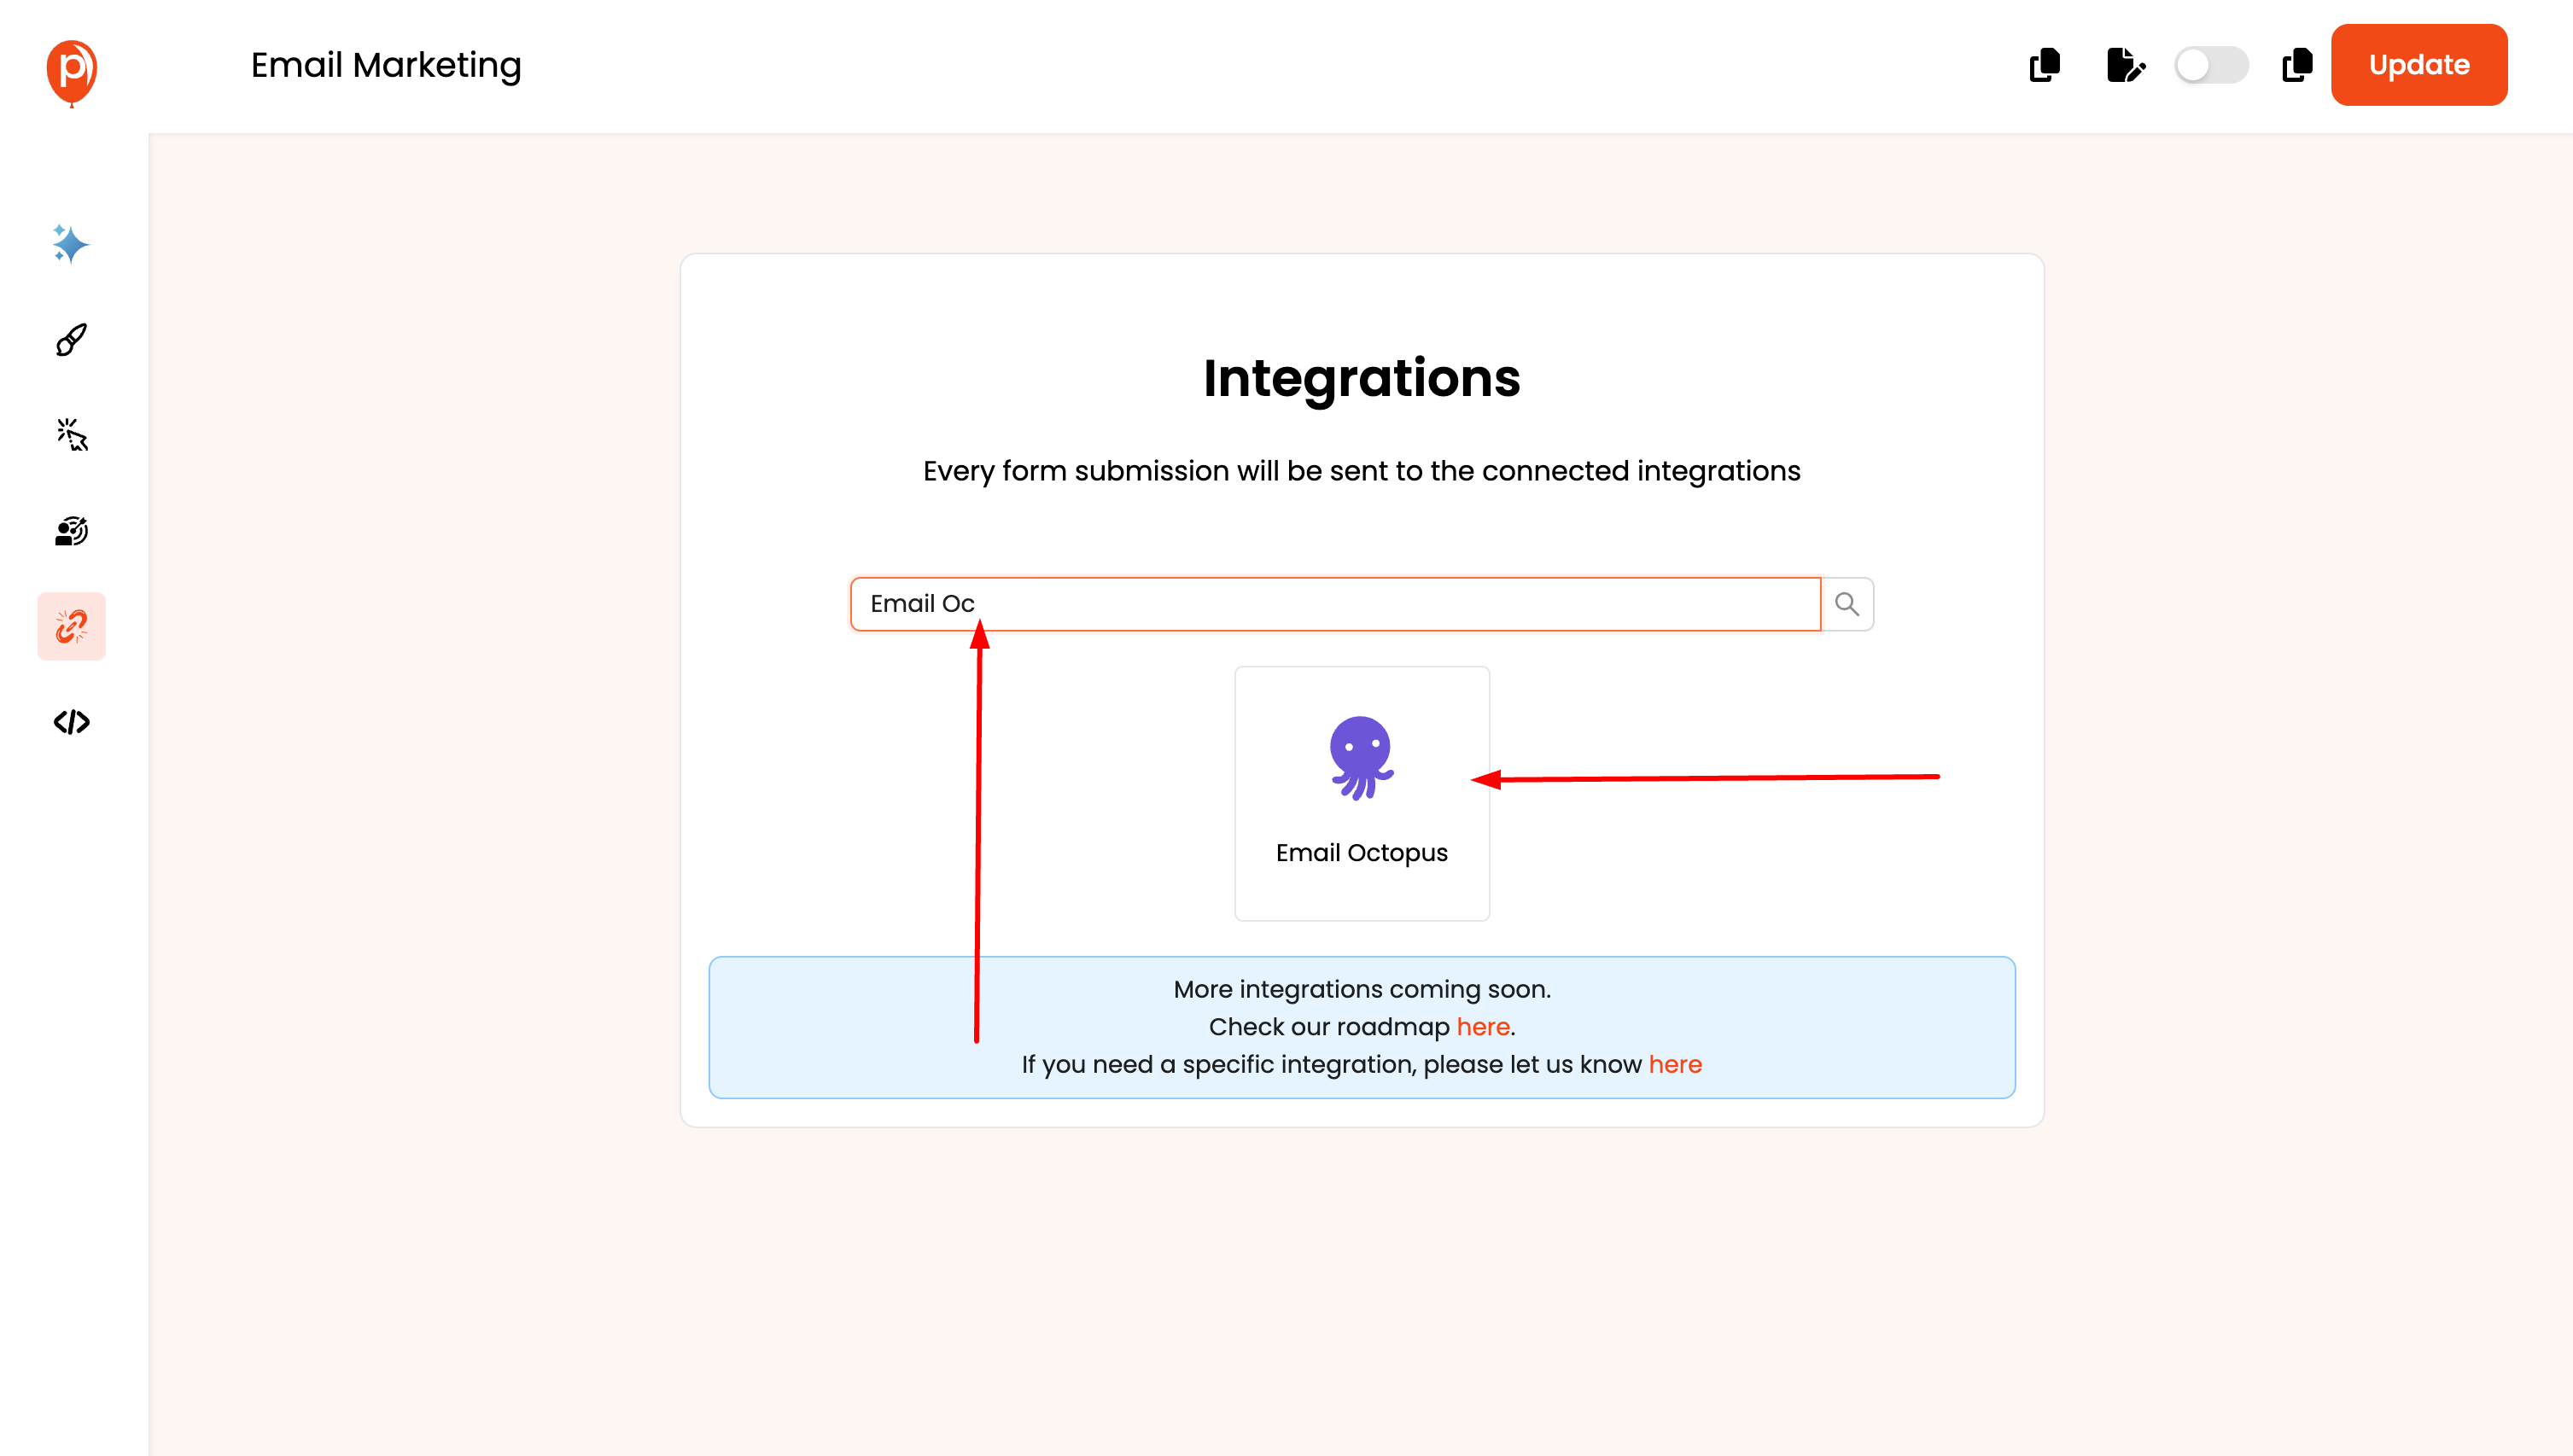
Name Your Integration and Connect to EmailOctopus: 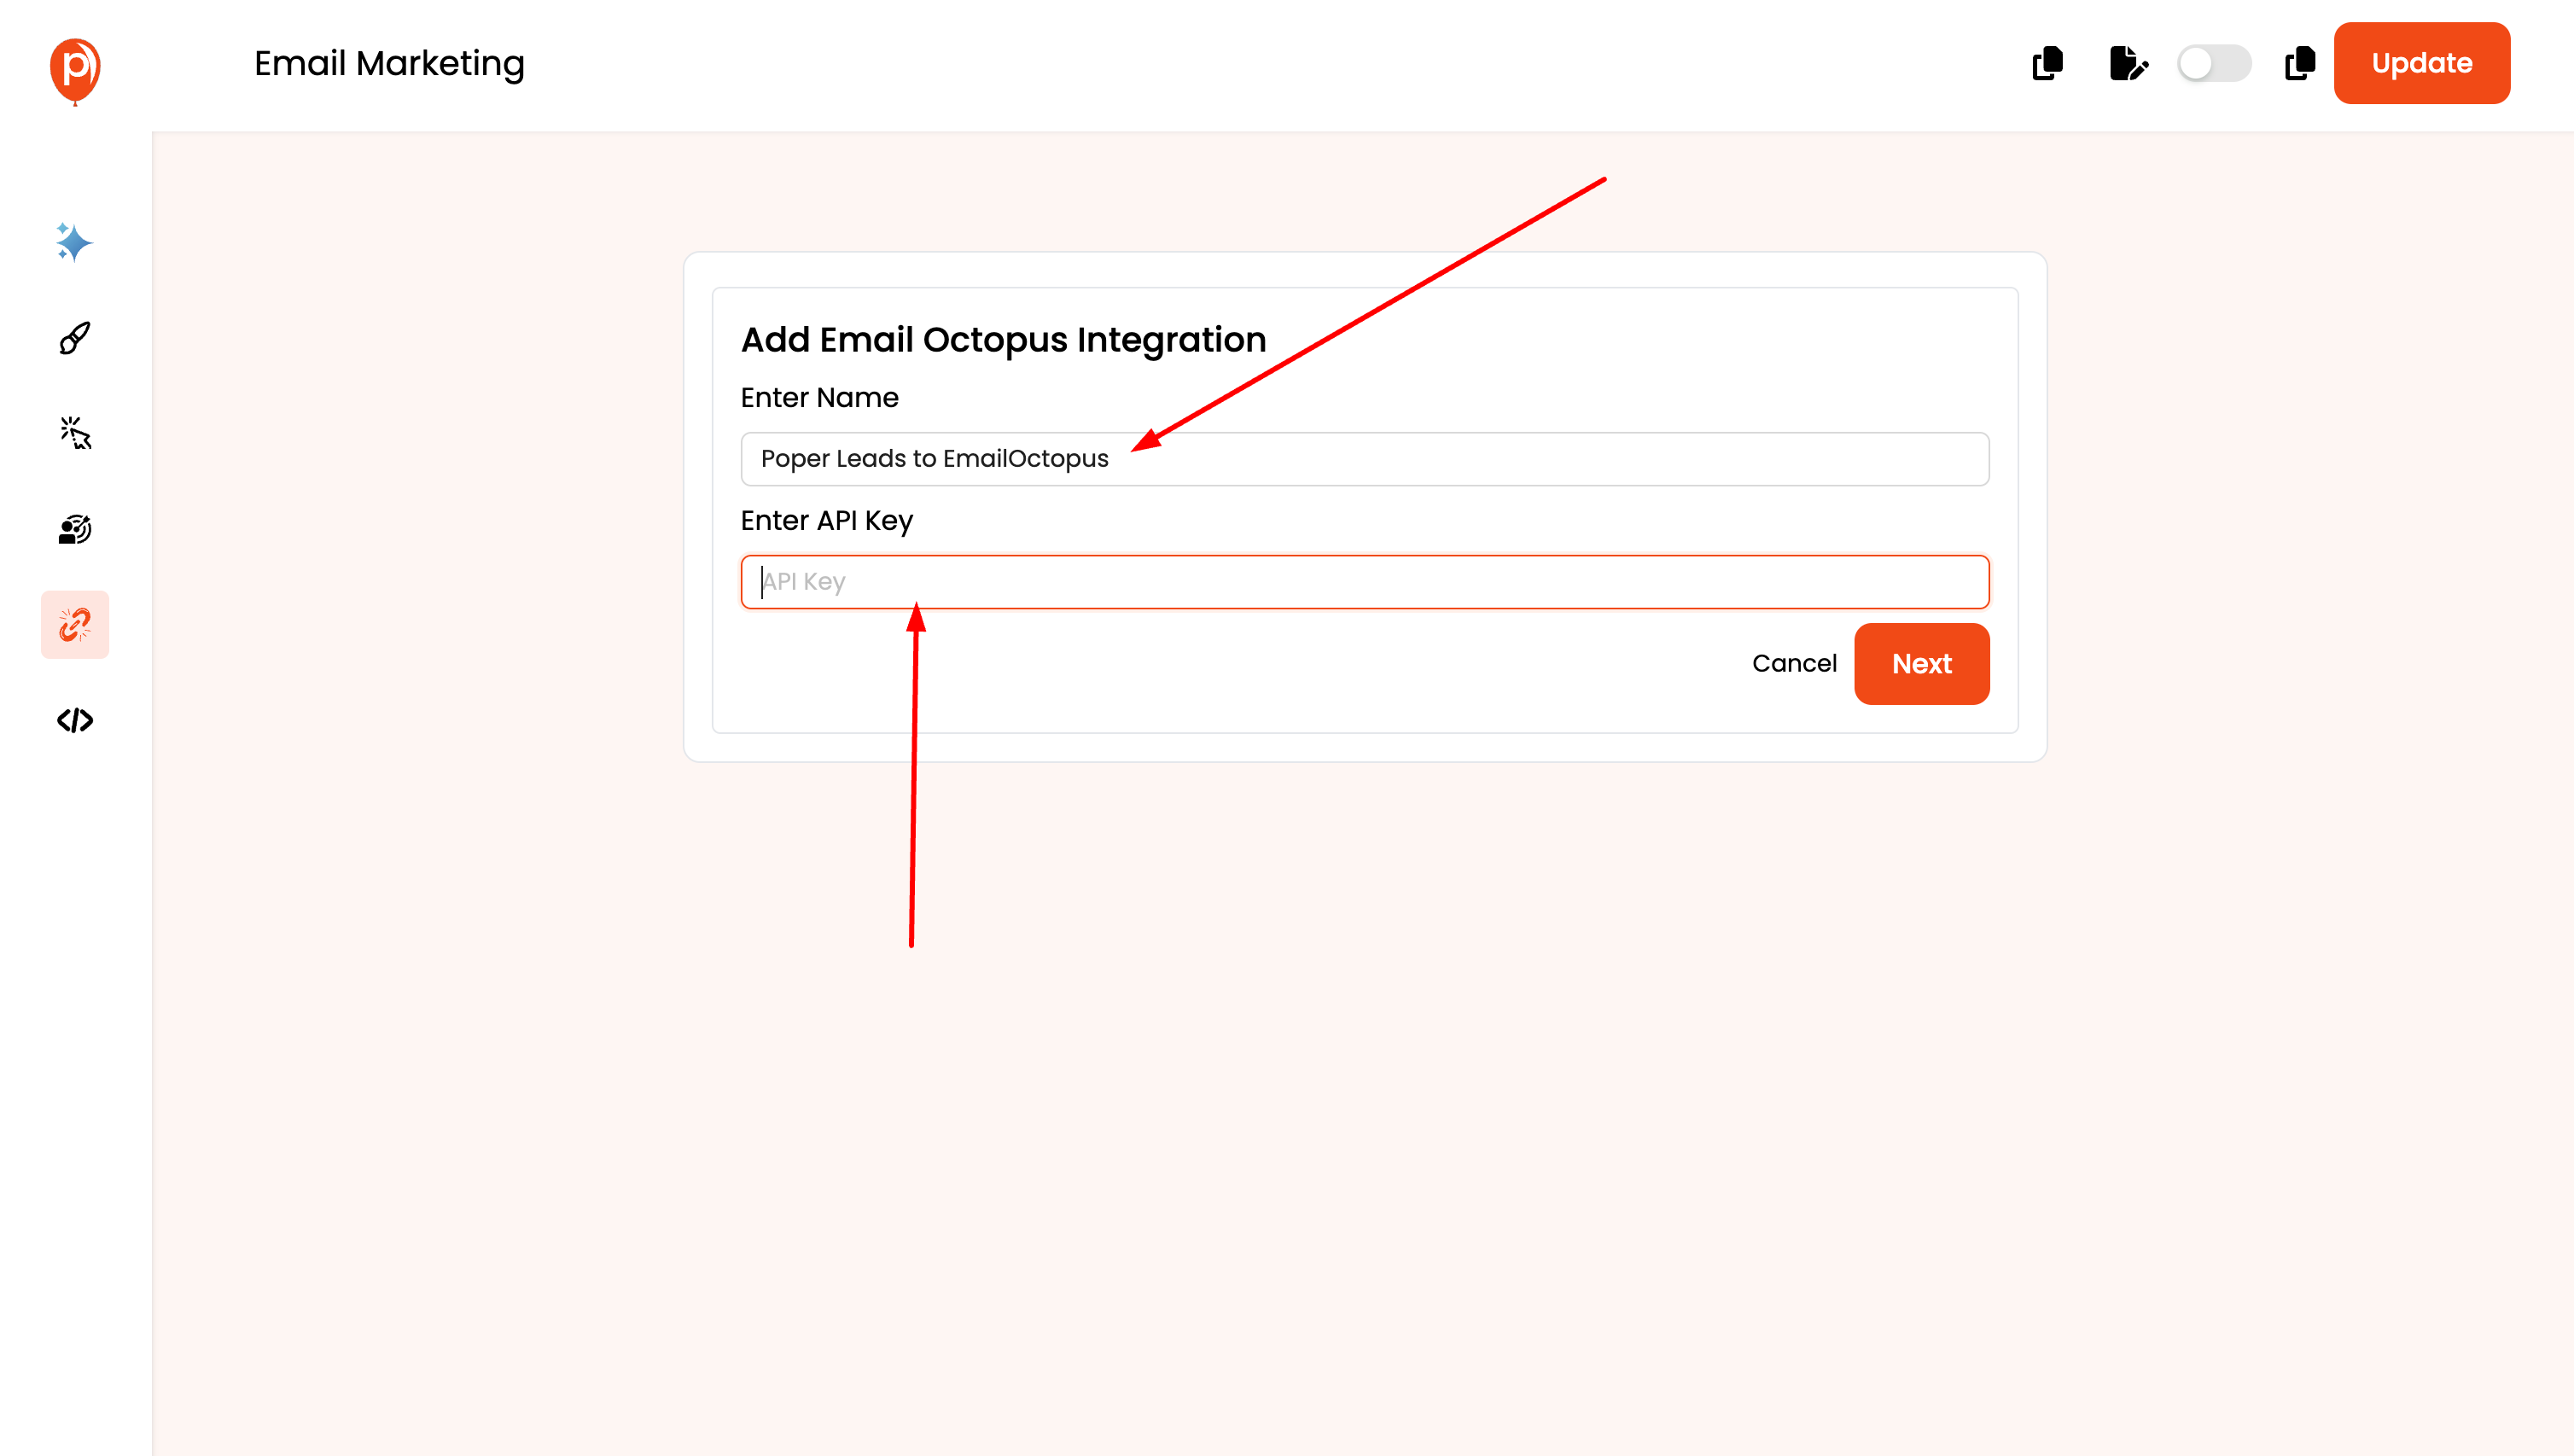
Select Your Email List:
Map Your Popup Fields: 
Complete the Integration: 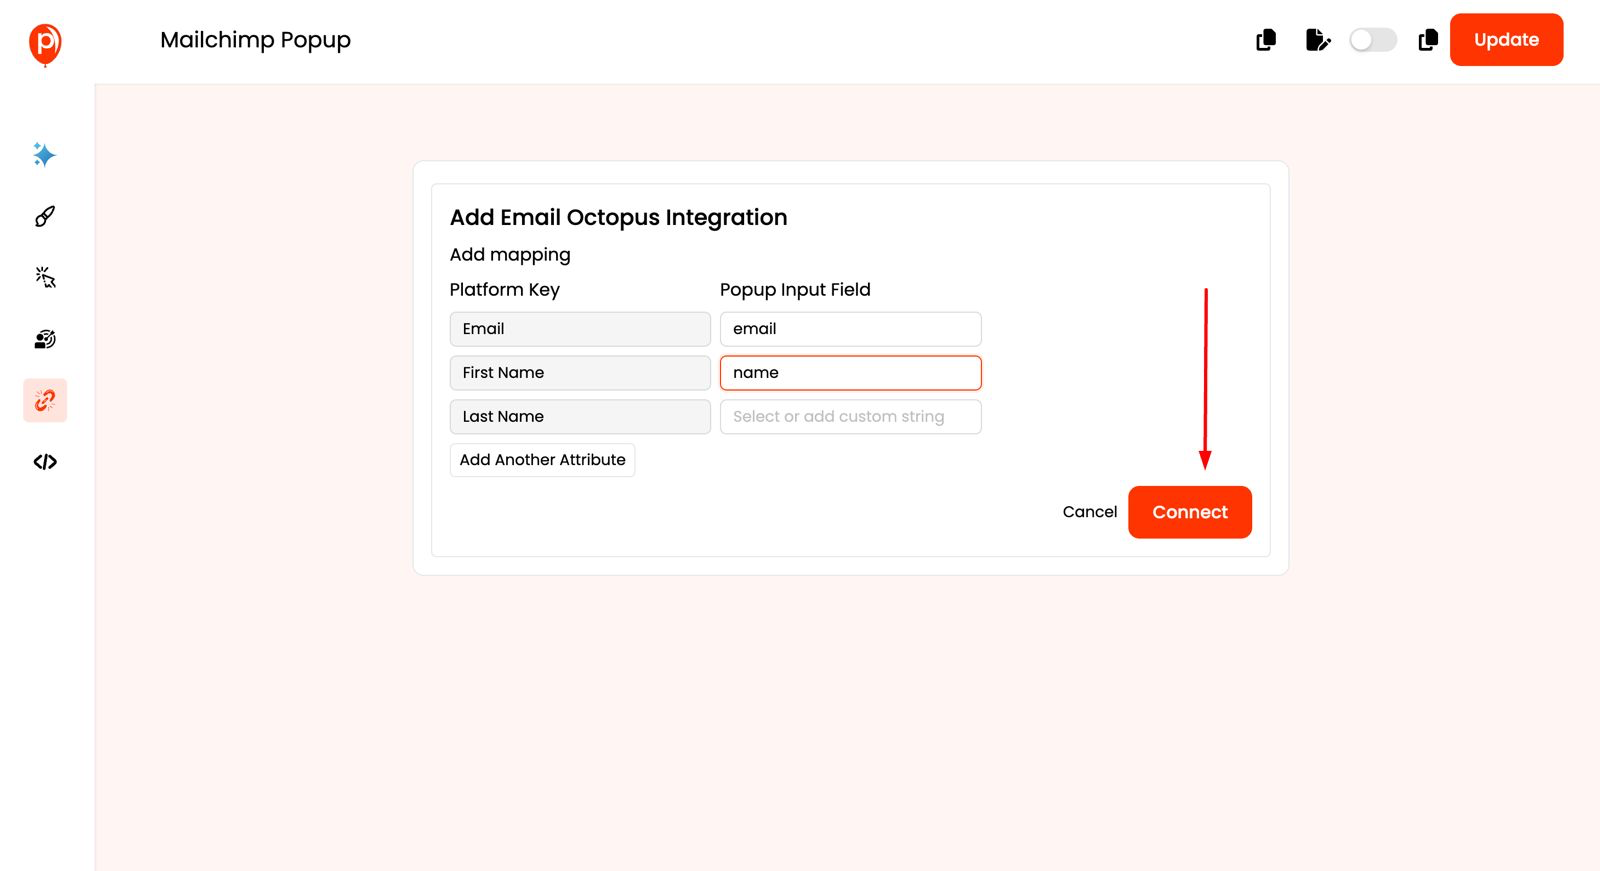
Test the Integration: 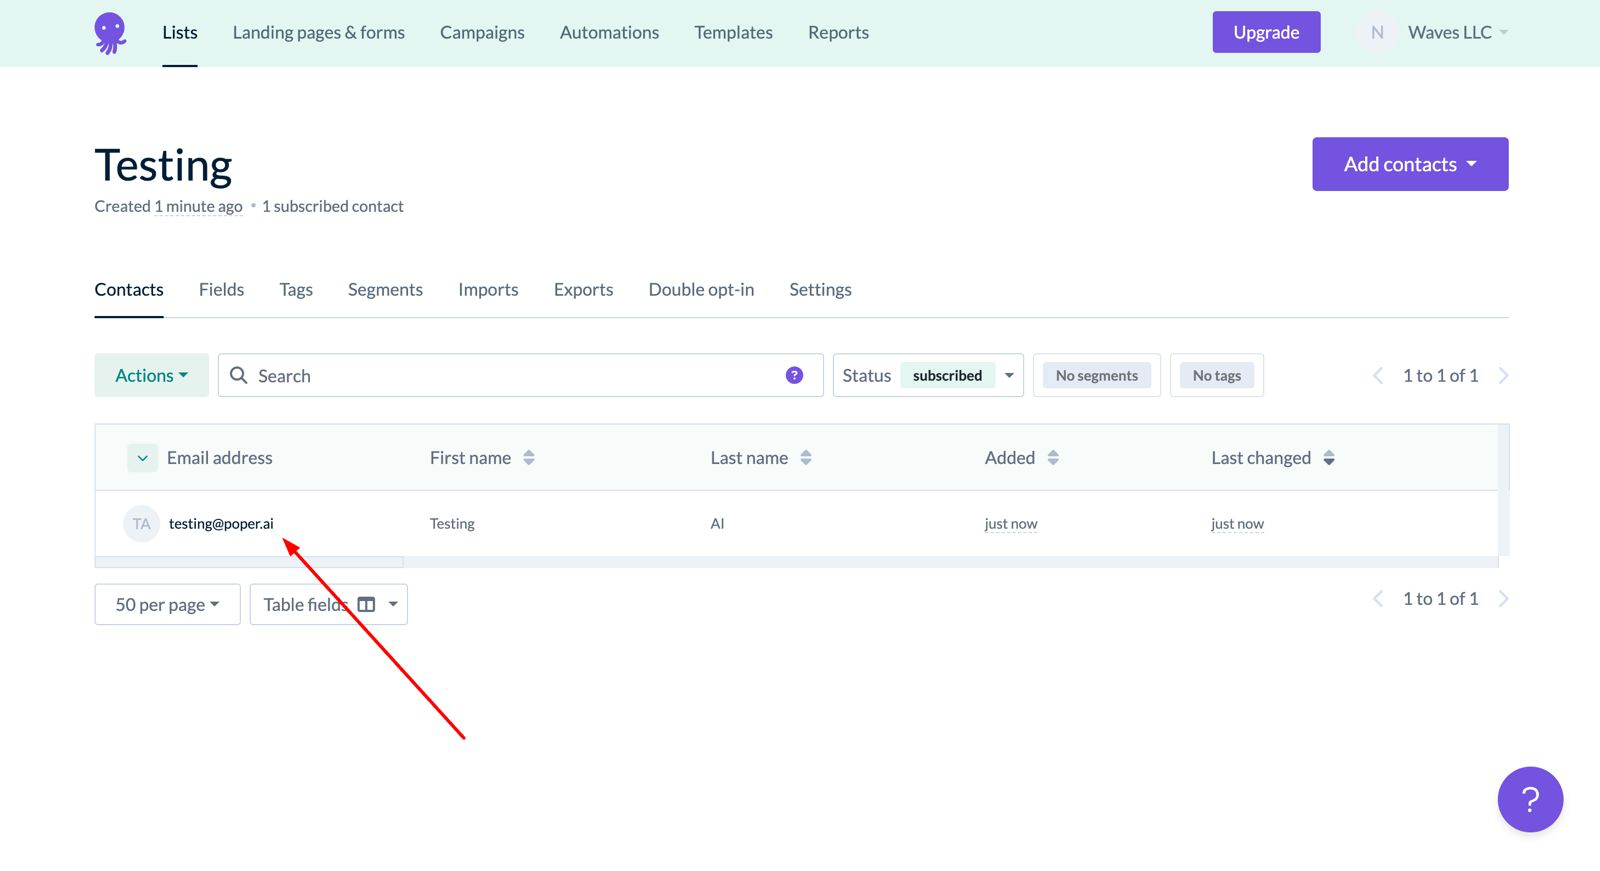
Congratulations! You've successfully integrated Poper with EmailOctopus. Now, all leads captured through your Poper popups will be automatically added to your designated EmailOctopus list, allowing you to effortlessly reach them with targeted email marketing campaigns.
Additional Tips:
- Ensure the field names and data types in your Poper popup form match the corresponding subscriber information fields in EmailOctopus for seamless data transfer.
- Regularly review and update your integration settings, especially if you make changes to your popup form fields or EmailOctopus list.
- Explore EmailOctopus's resources to learn how to create effective email marketing campaigns that resonate with your leads captured through Poper popups.
By following these steps, you can bridge the gap between your lead capture efforts and your email marketing platform,allowing you to nurture leads and grow your business.
Related Articles
AWeber Integration
This guide will show you how to integrate AWeber, your email marketing platform, with Poper, your lead capture popup builder. This integration allows you to effortlessly add leads captured through your Poper popups directly to your AWeber subscriber ...Enginemailer Integration
This guide will show you how to integrate Enginemailer, your email marketing platform, with Poper, your lead capture popup builder. This integration allows you to effortlessly add leads captured through your Poper popups directly to your Enginemailer ...Klaviyo Integration
Effortlessly manage your email marketing campaigns by integrating Klaviyo with Poper. Follow these simple steps to set up the integration: How to Integrate Klaviyo in Poper: Edit Popup: Navigate to the Poper dashboard and locate the popup where you ...Mailerlite Integration
Effortlessly manage your subscribers and email campaigns by integrating Mailerlite with Poper. Follow these straightforward steps to set up the integration: How to Integrate Mailerlite in Poper: Edit Popup: Navigate to the Poper dashboard and locate ...Drip Integration
Optimize your email marketing strategy by seamlessly integrating Drip with Poper. Follow these simple steps to set up the integration: How to Integrate Drip in Poper: Edit Popup: Navigate to the Poper dashboard and locate the popup where you want to ...