How to create Multi Steps in Poper
Poper empowers you to create captivating popups with a multi-step format, keeping your visitors engaged and maximizing conversions. This guide will walk you through the process of building a two-step popup, capturing both email and name from your audience.
Accessing the Steps Bar:
Open Your Poper Popup: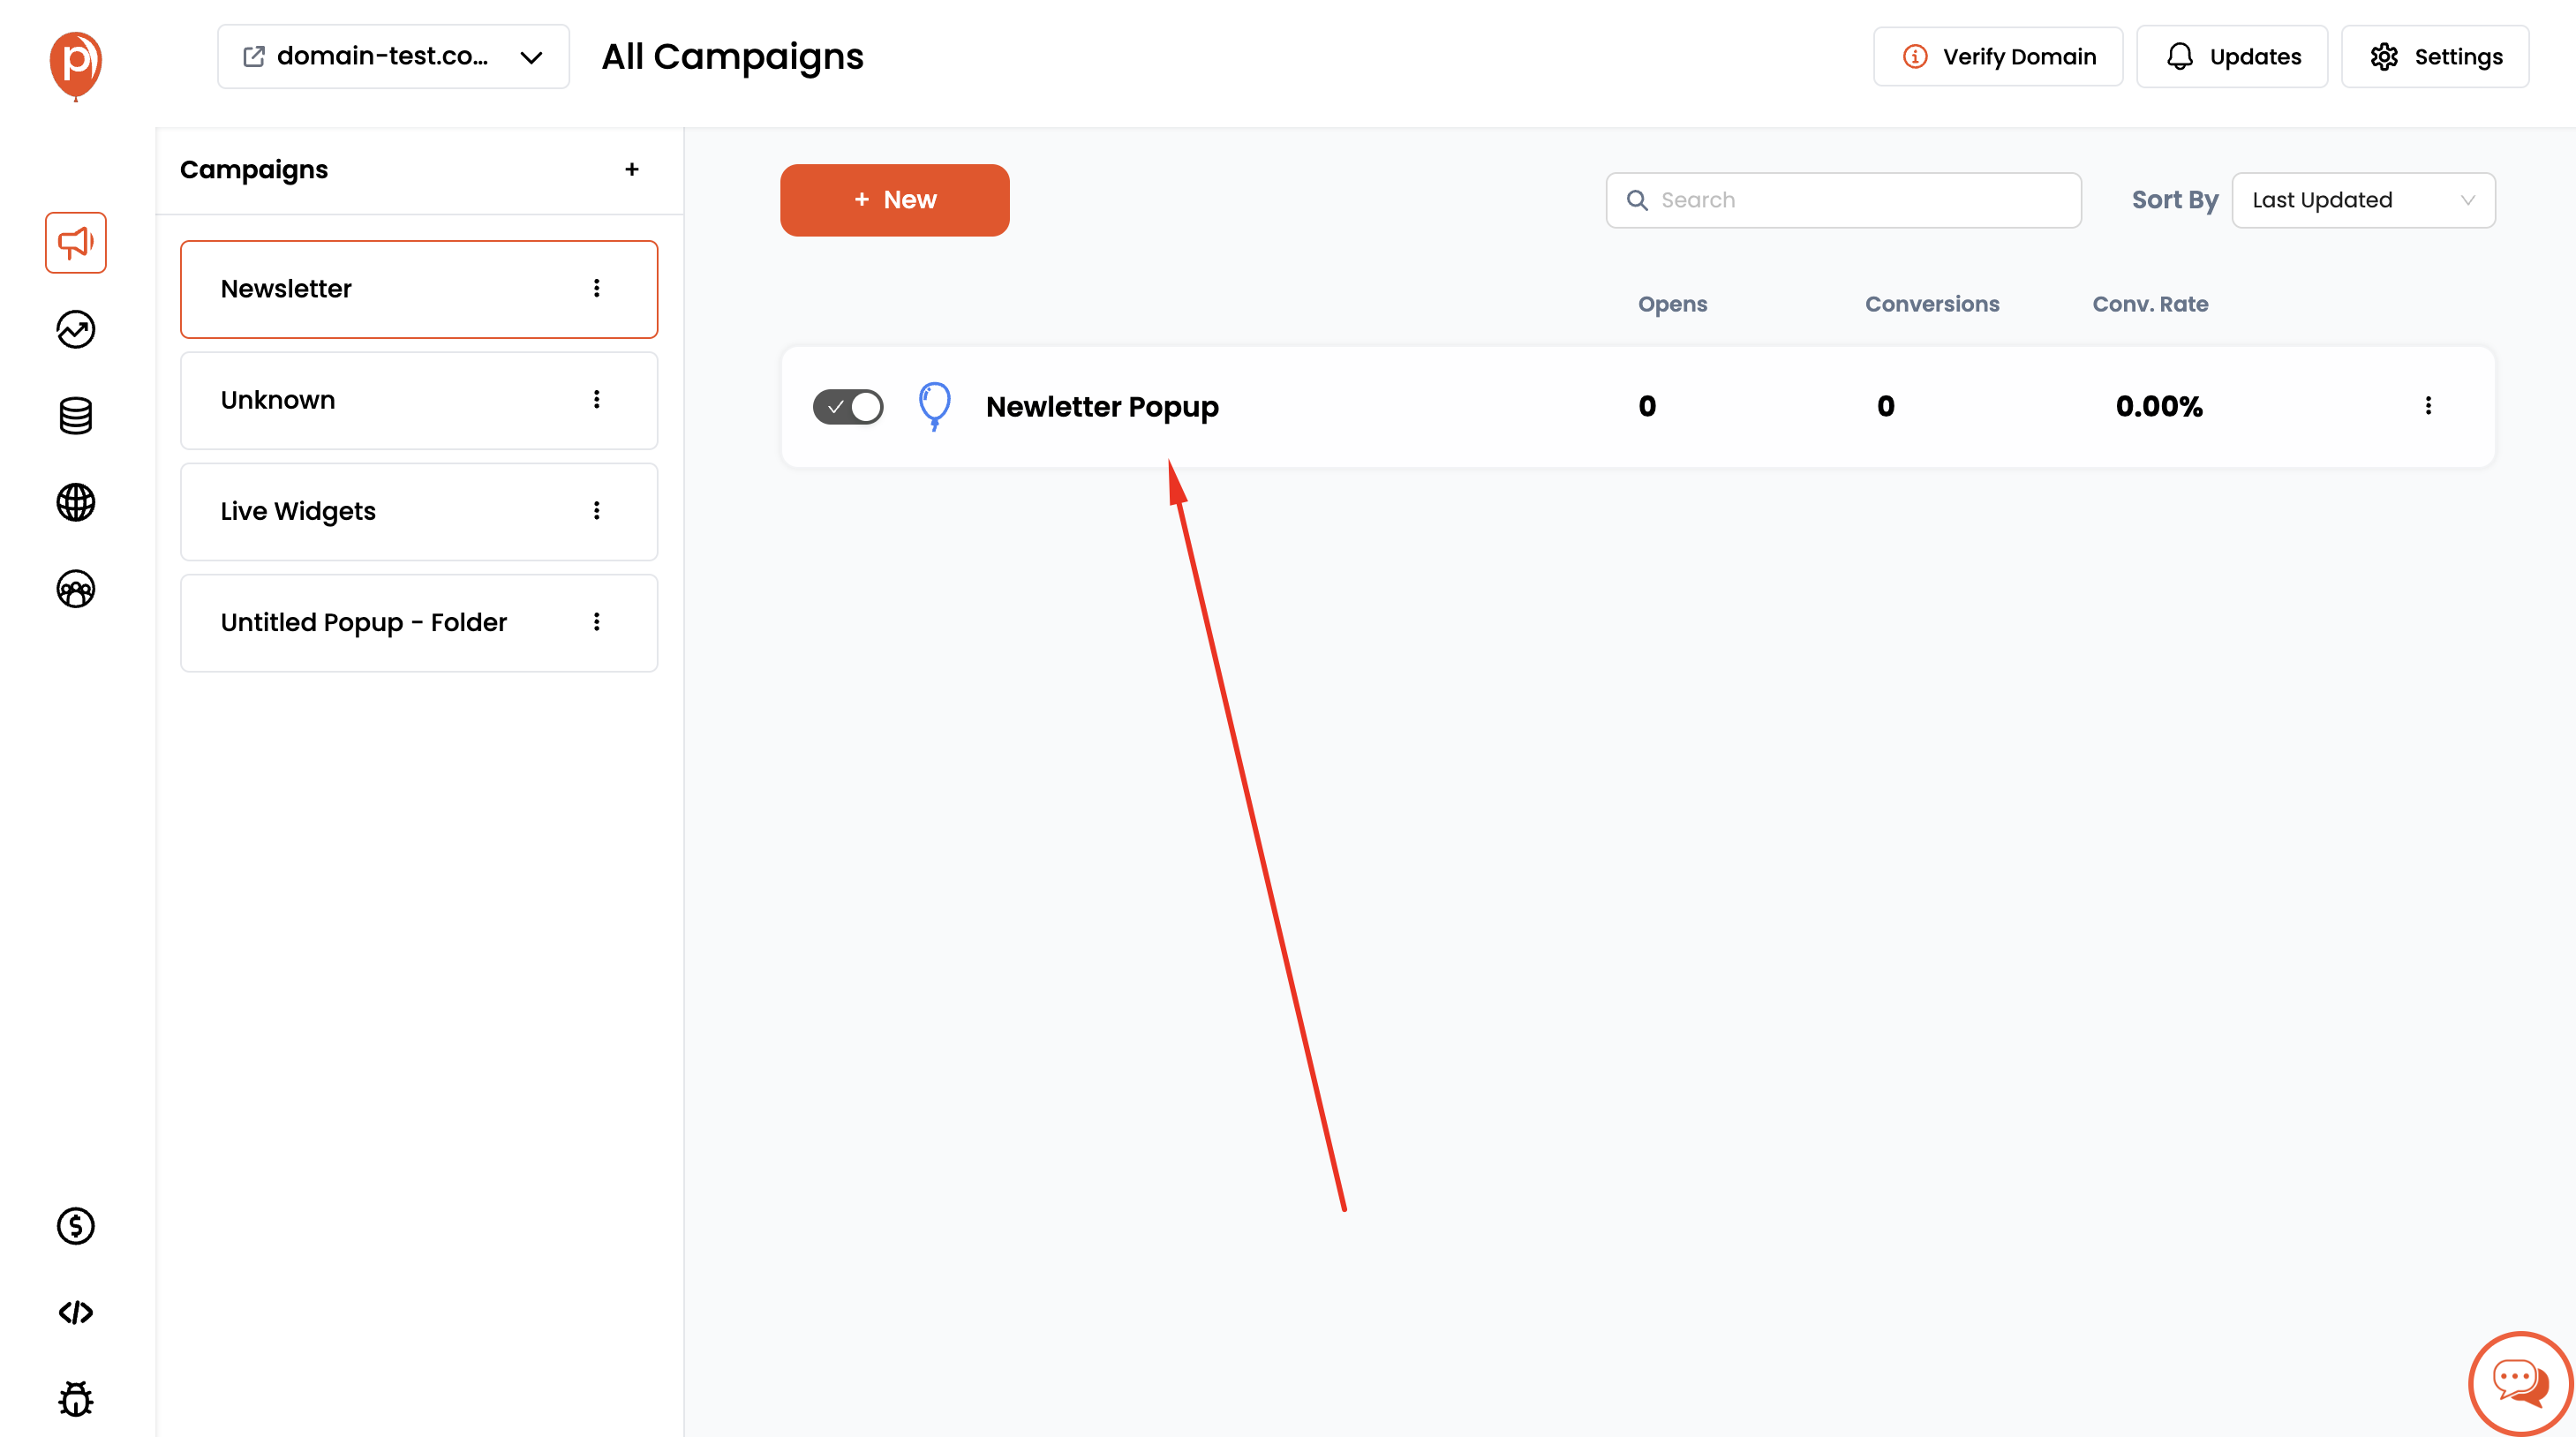
Begin by logging in to your Poper dashboard and navigating to the specific popup you want to edit.
Locate the Steps Bar: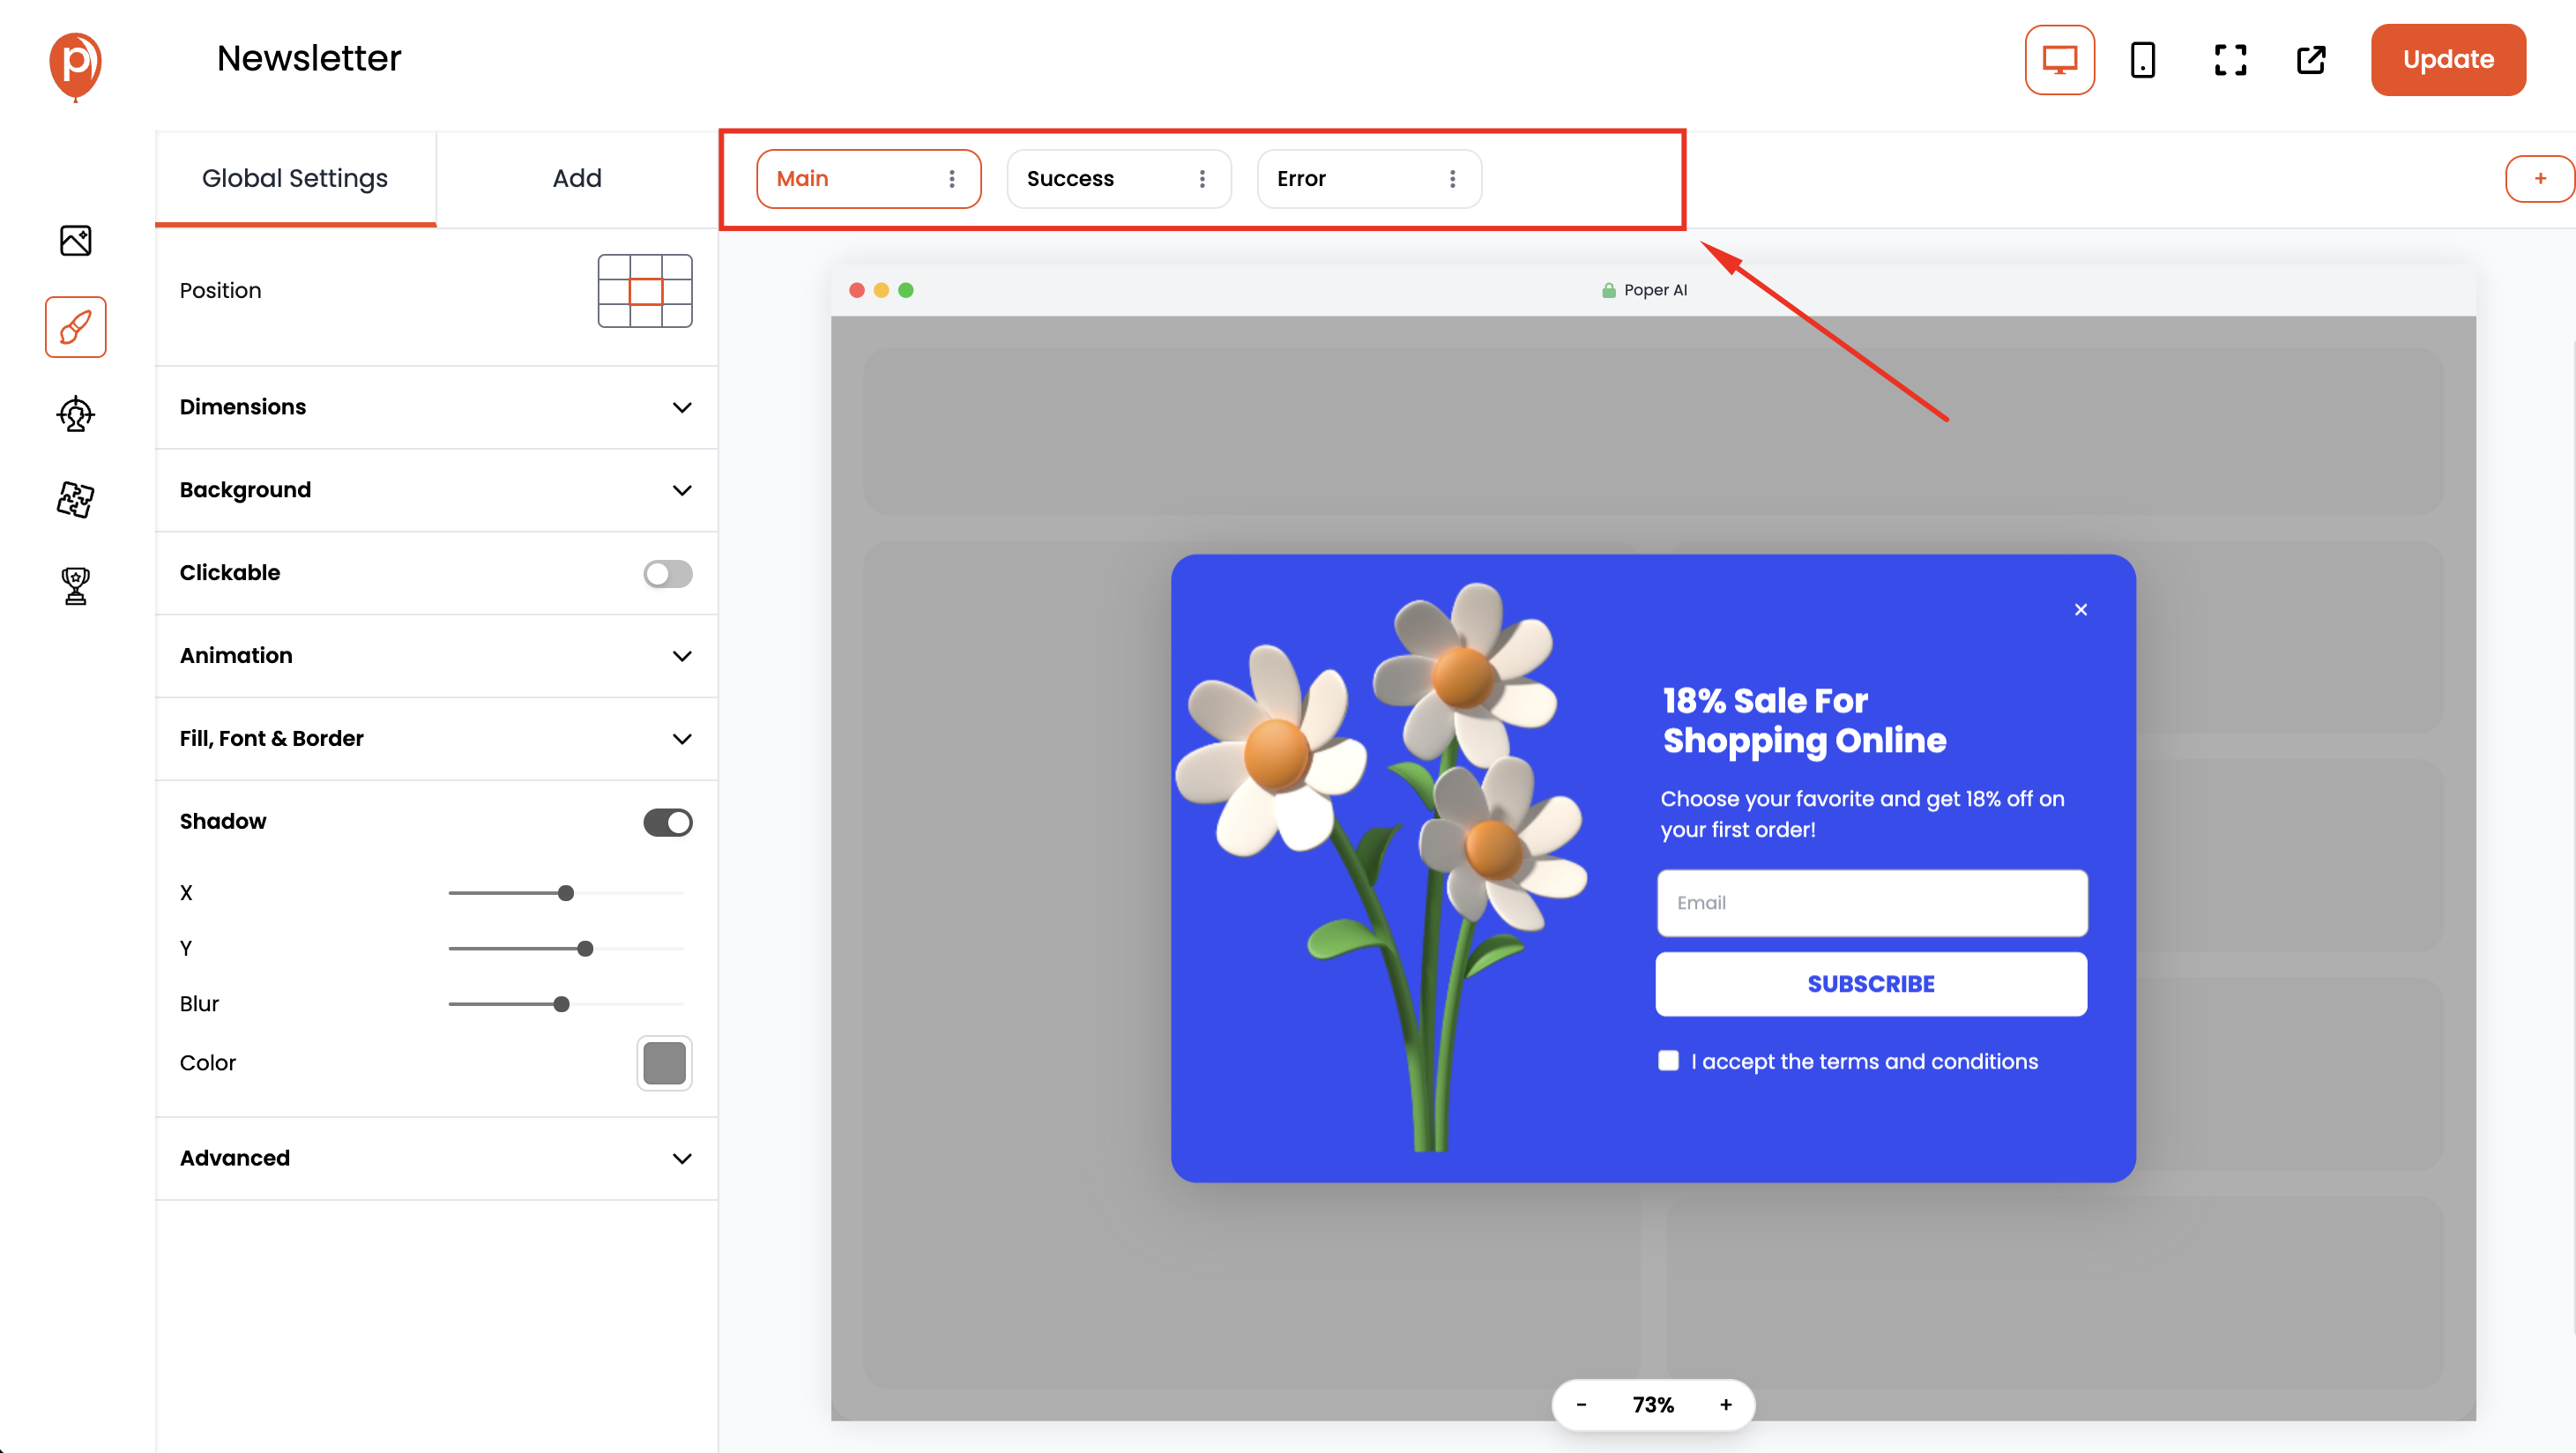
Look for the horizontal bar situated at the top of the popup editor, directly below the popup title. This bar displays and manages all the steps within your popup sequence.
Throughout this guide, we'll create a two-step popup: first step for capturing email addresses and second step for names.
Step 1: Capture Email Address
Create the Main Step: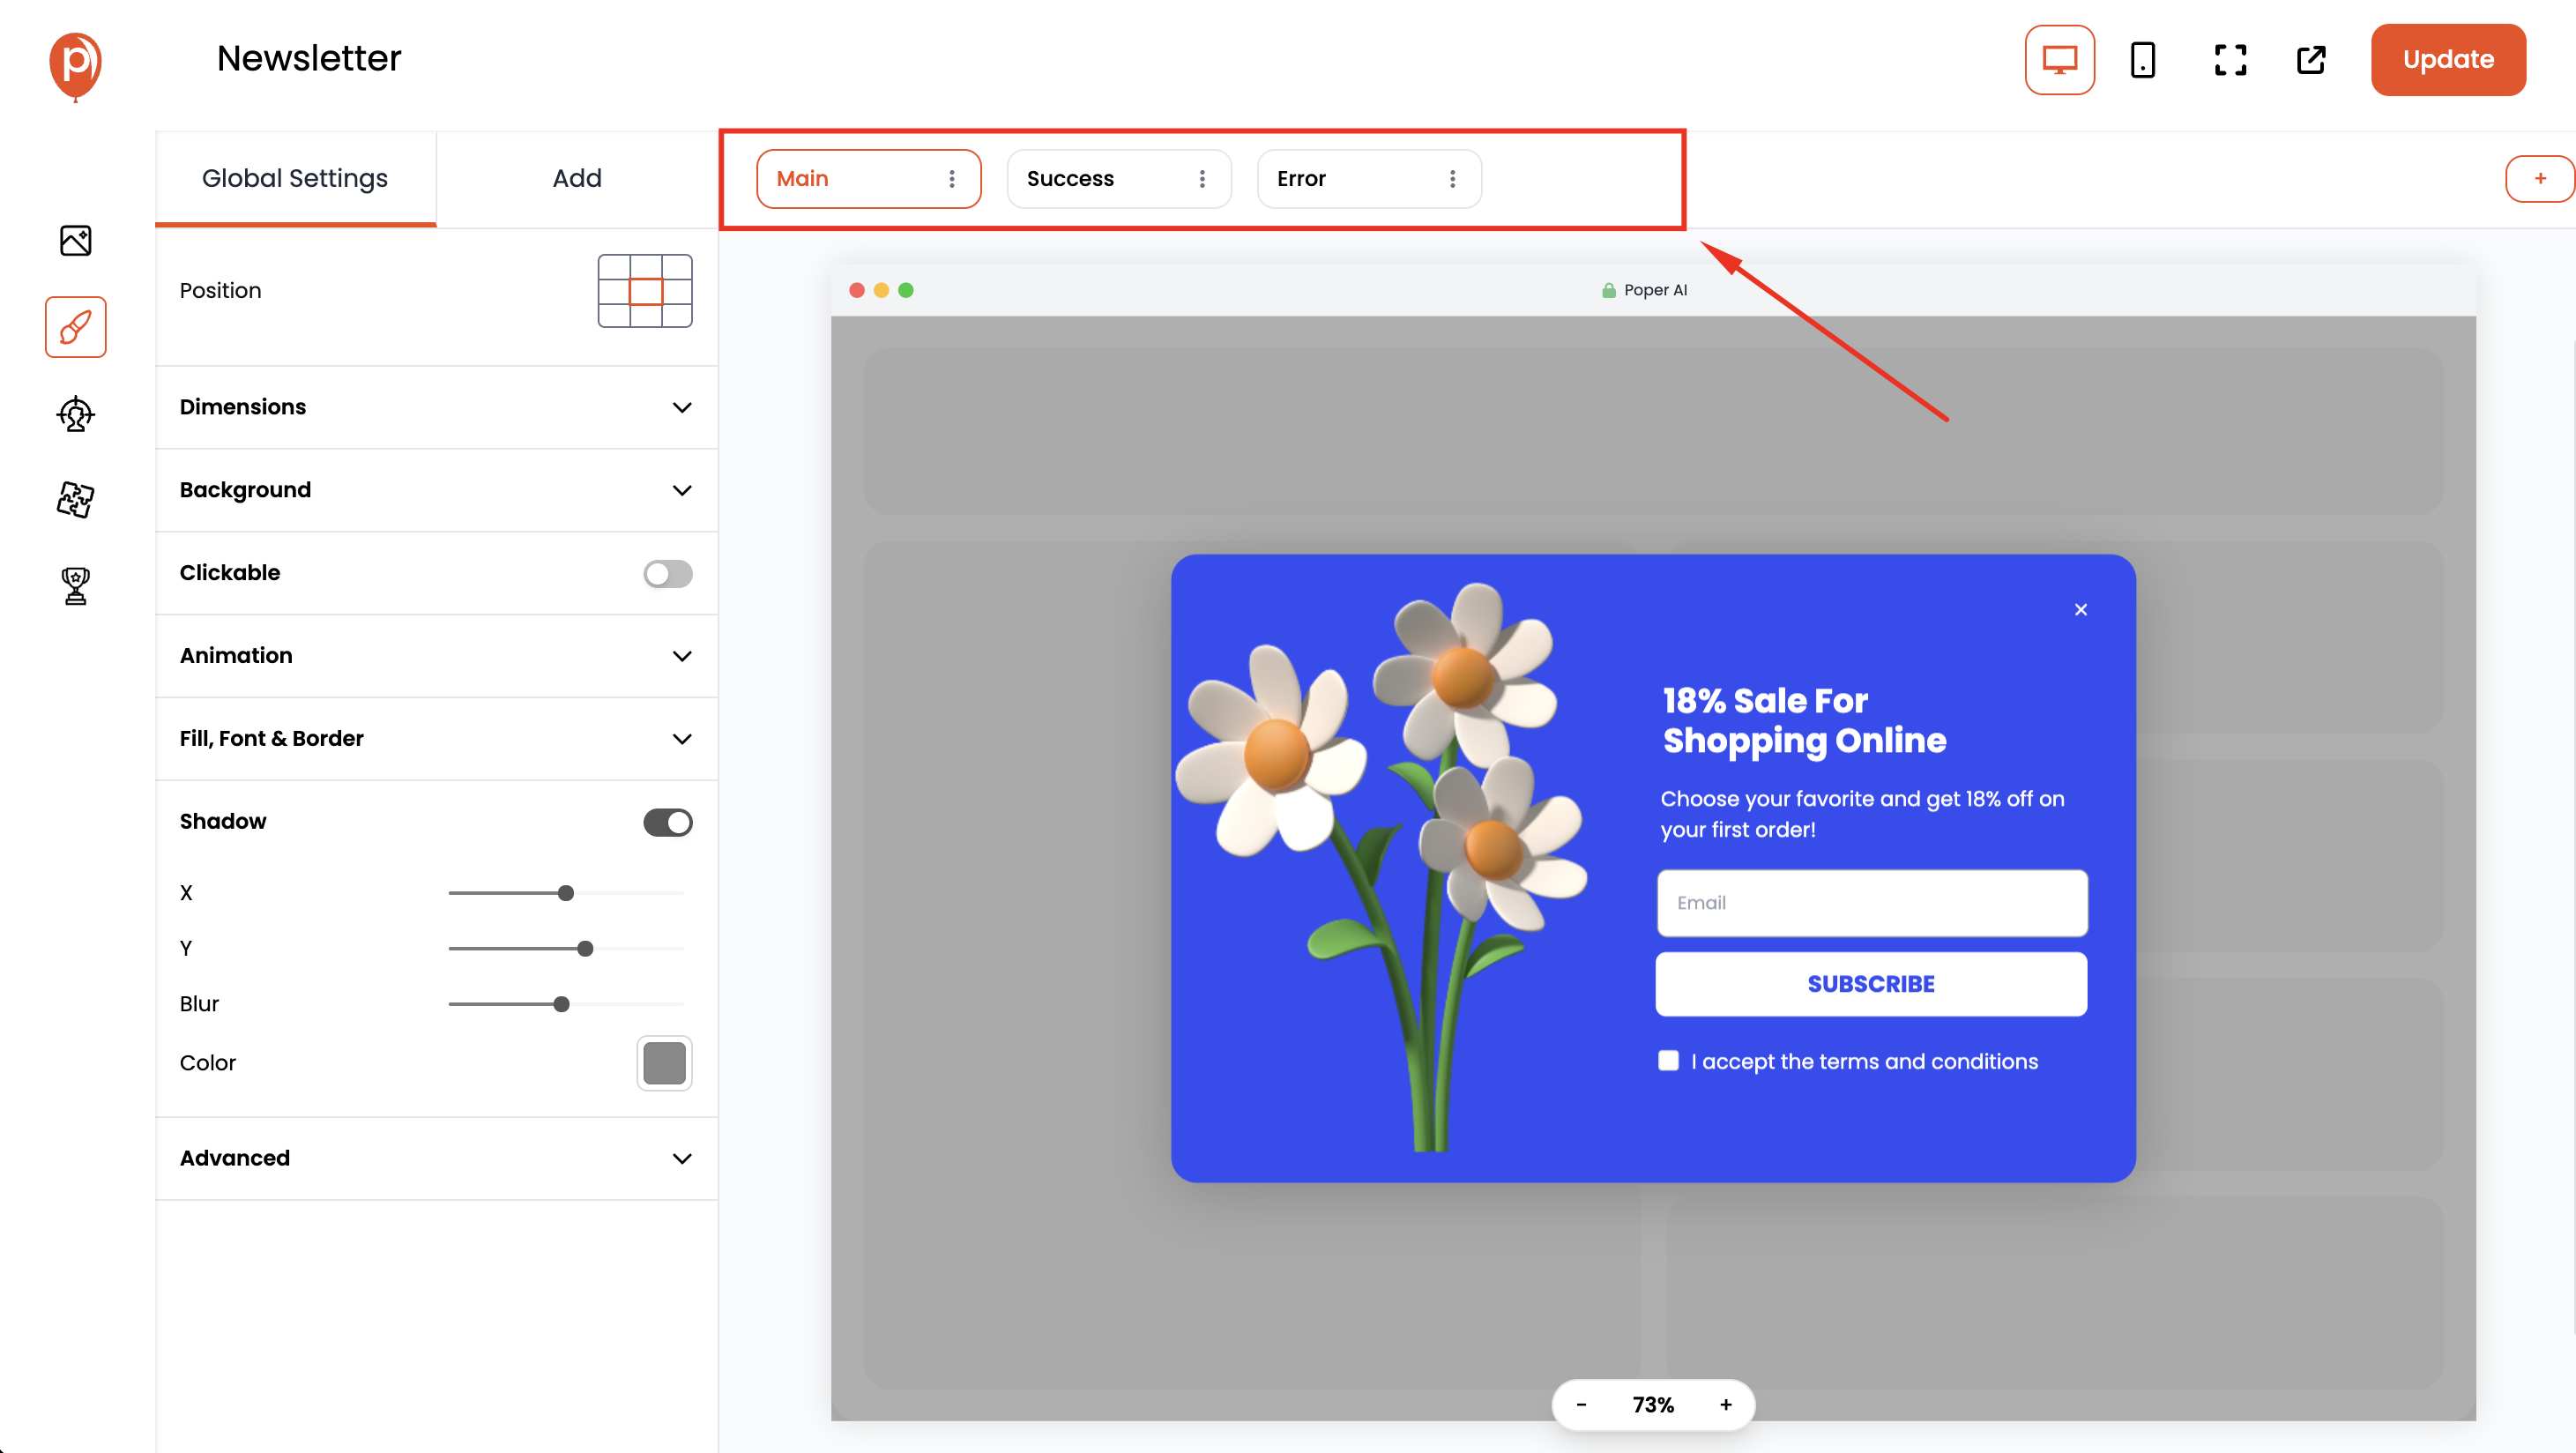
Within the steps bar, you most likely have a default "Main" already present. This will be your initial step where you'll collect email addresses.
Add Email Input: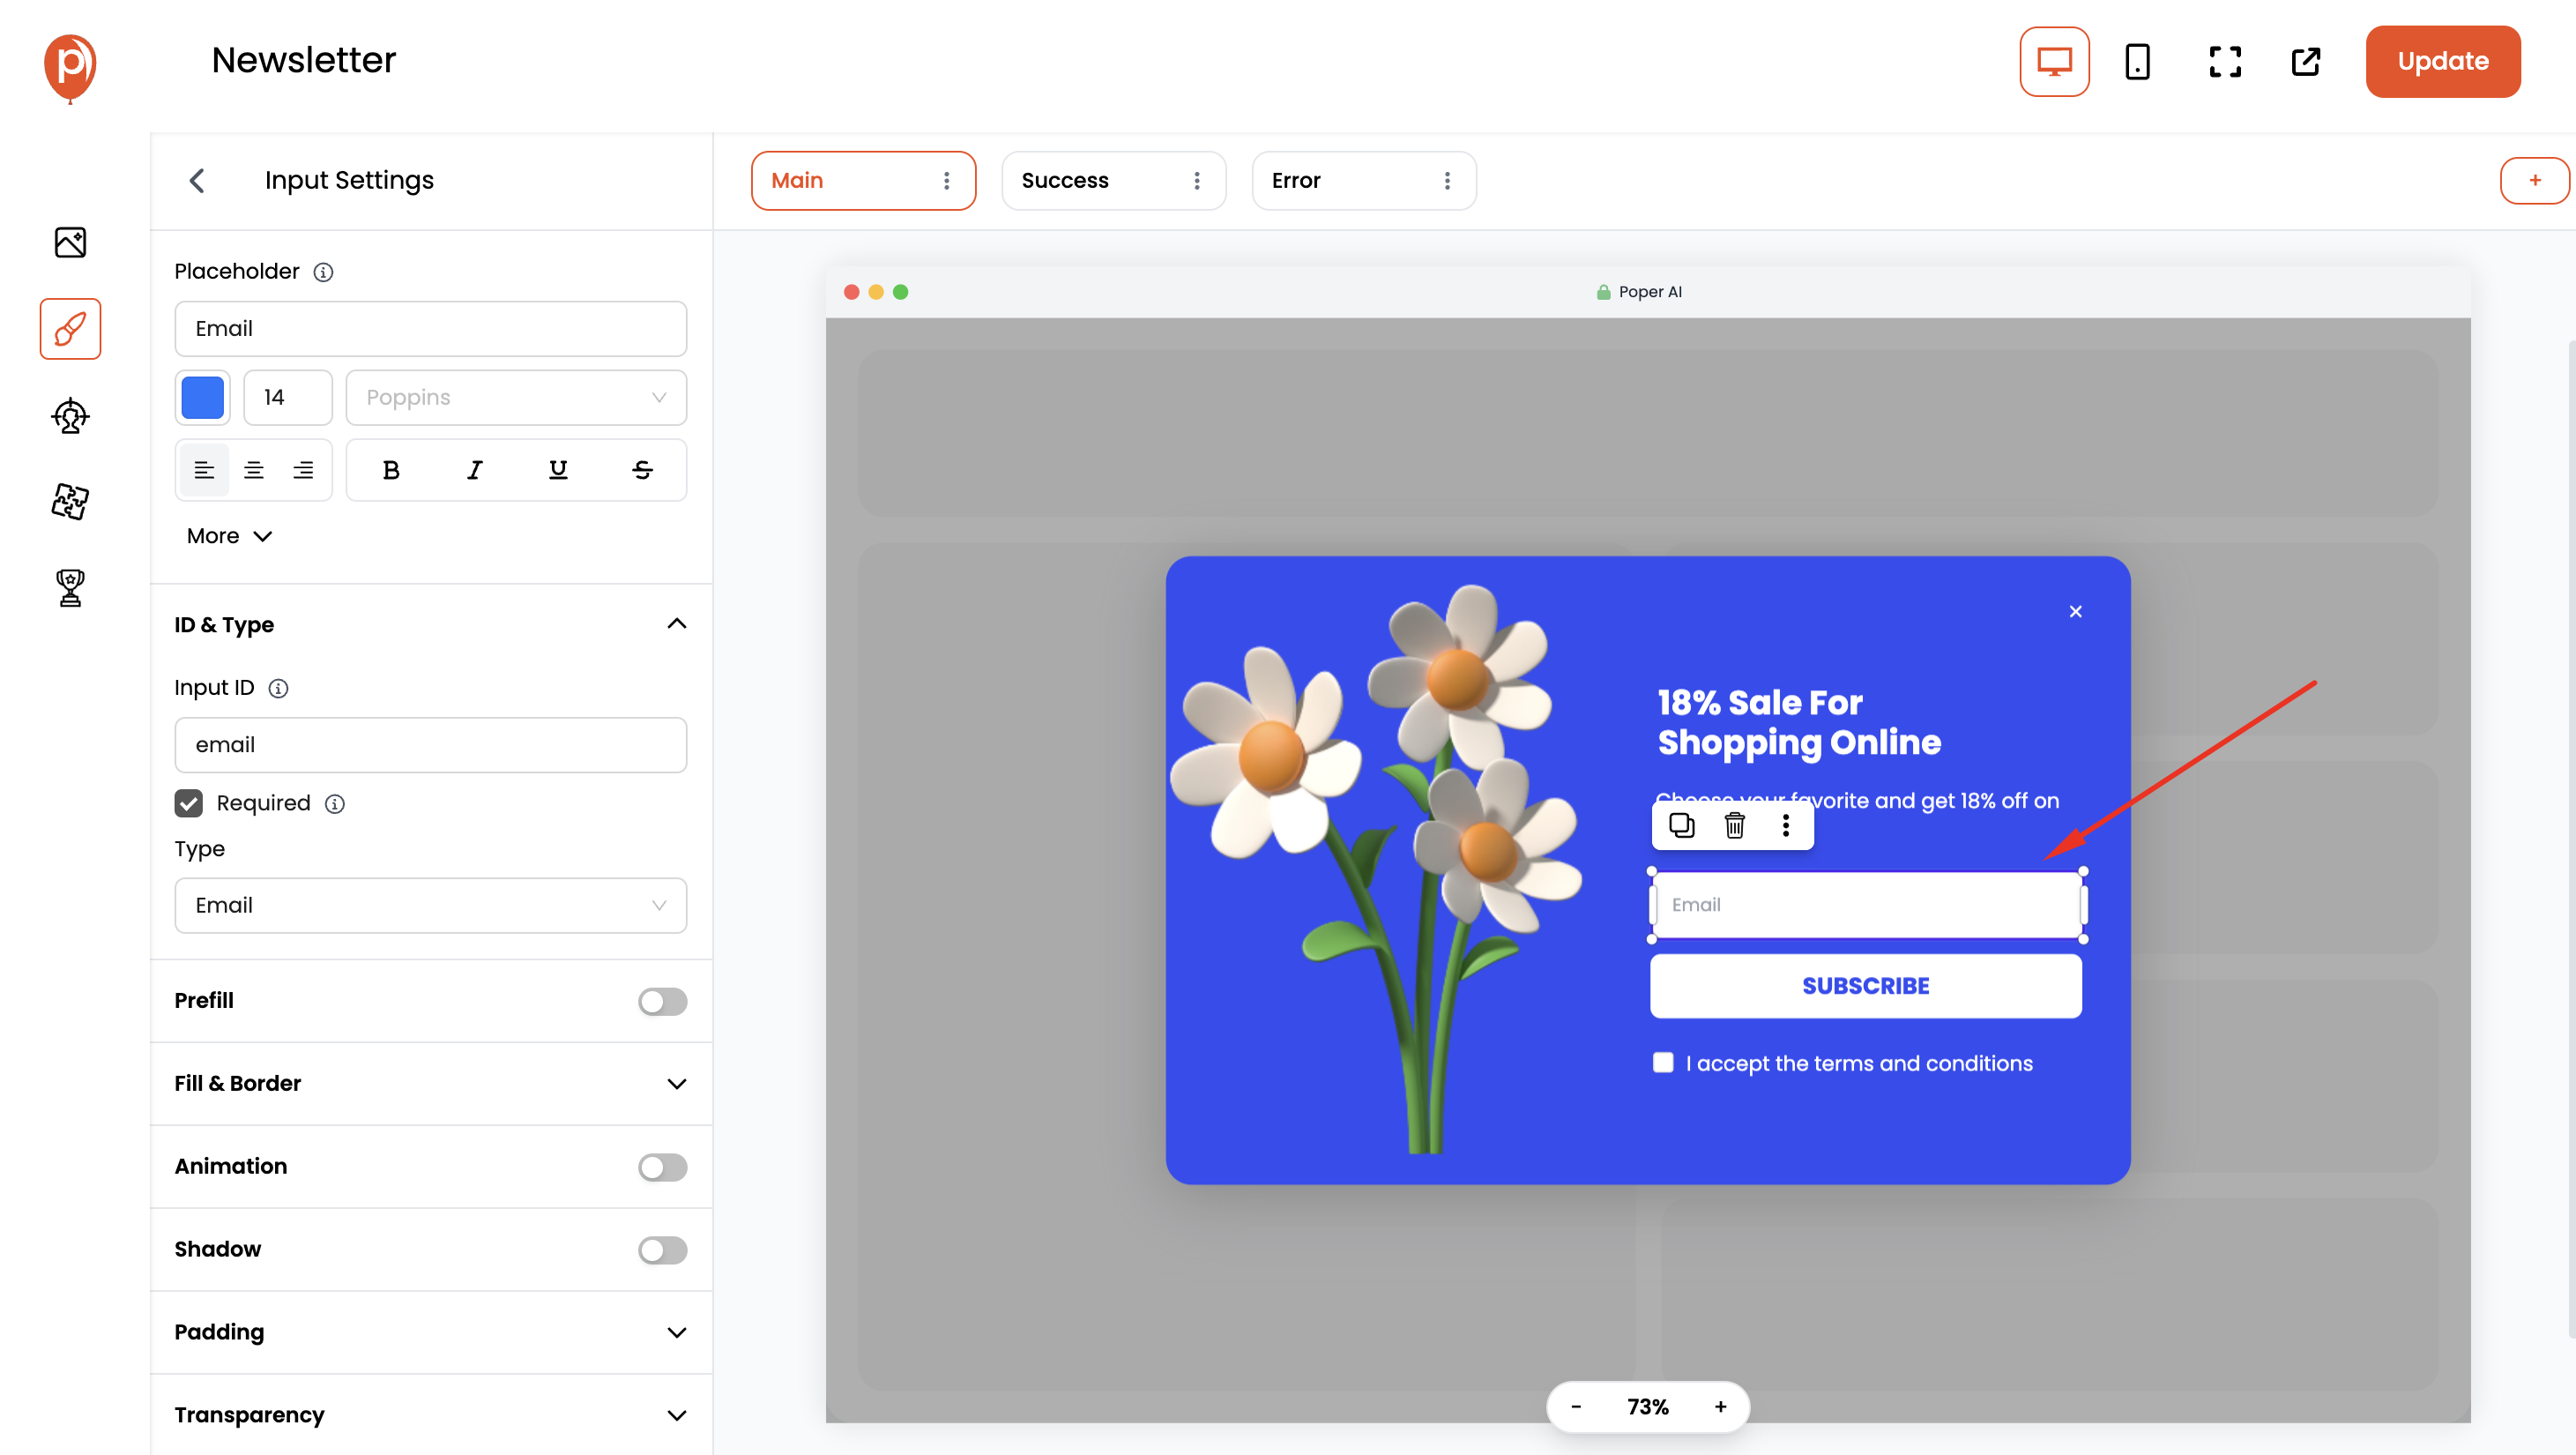
In the editing area of your main step, use the available elements to incorporate an email input field. This will allow visitors to enter their email addresses.
Step 2: Capture Name
Duplicate the Main Step: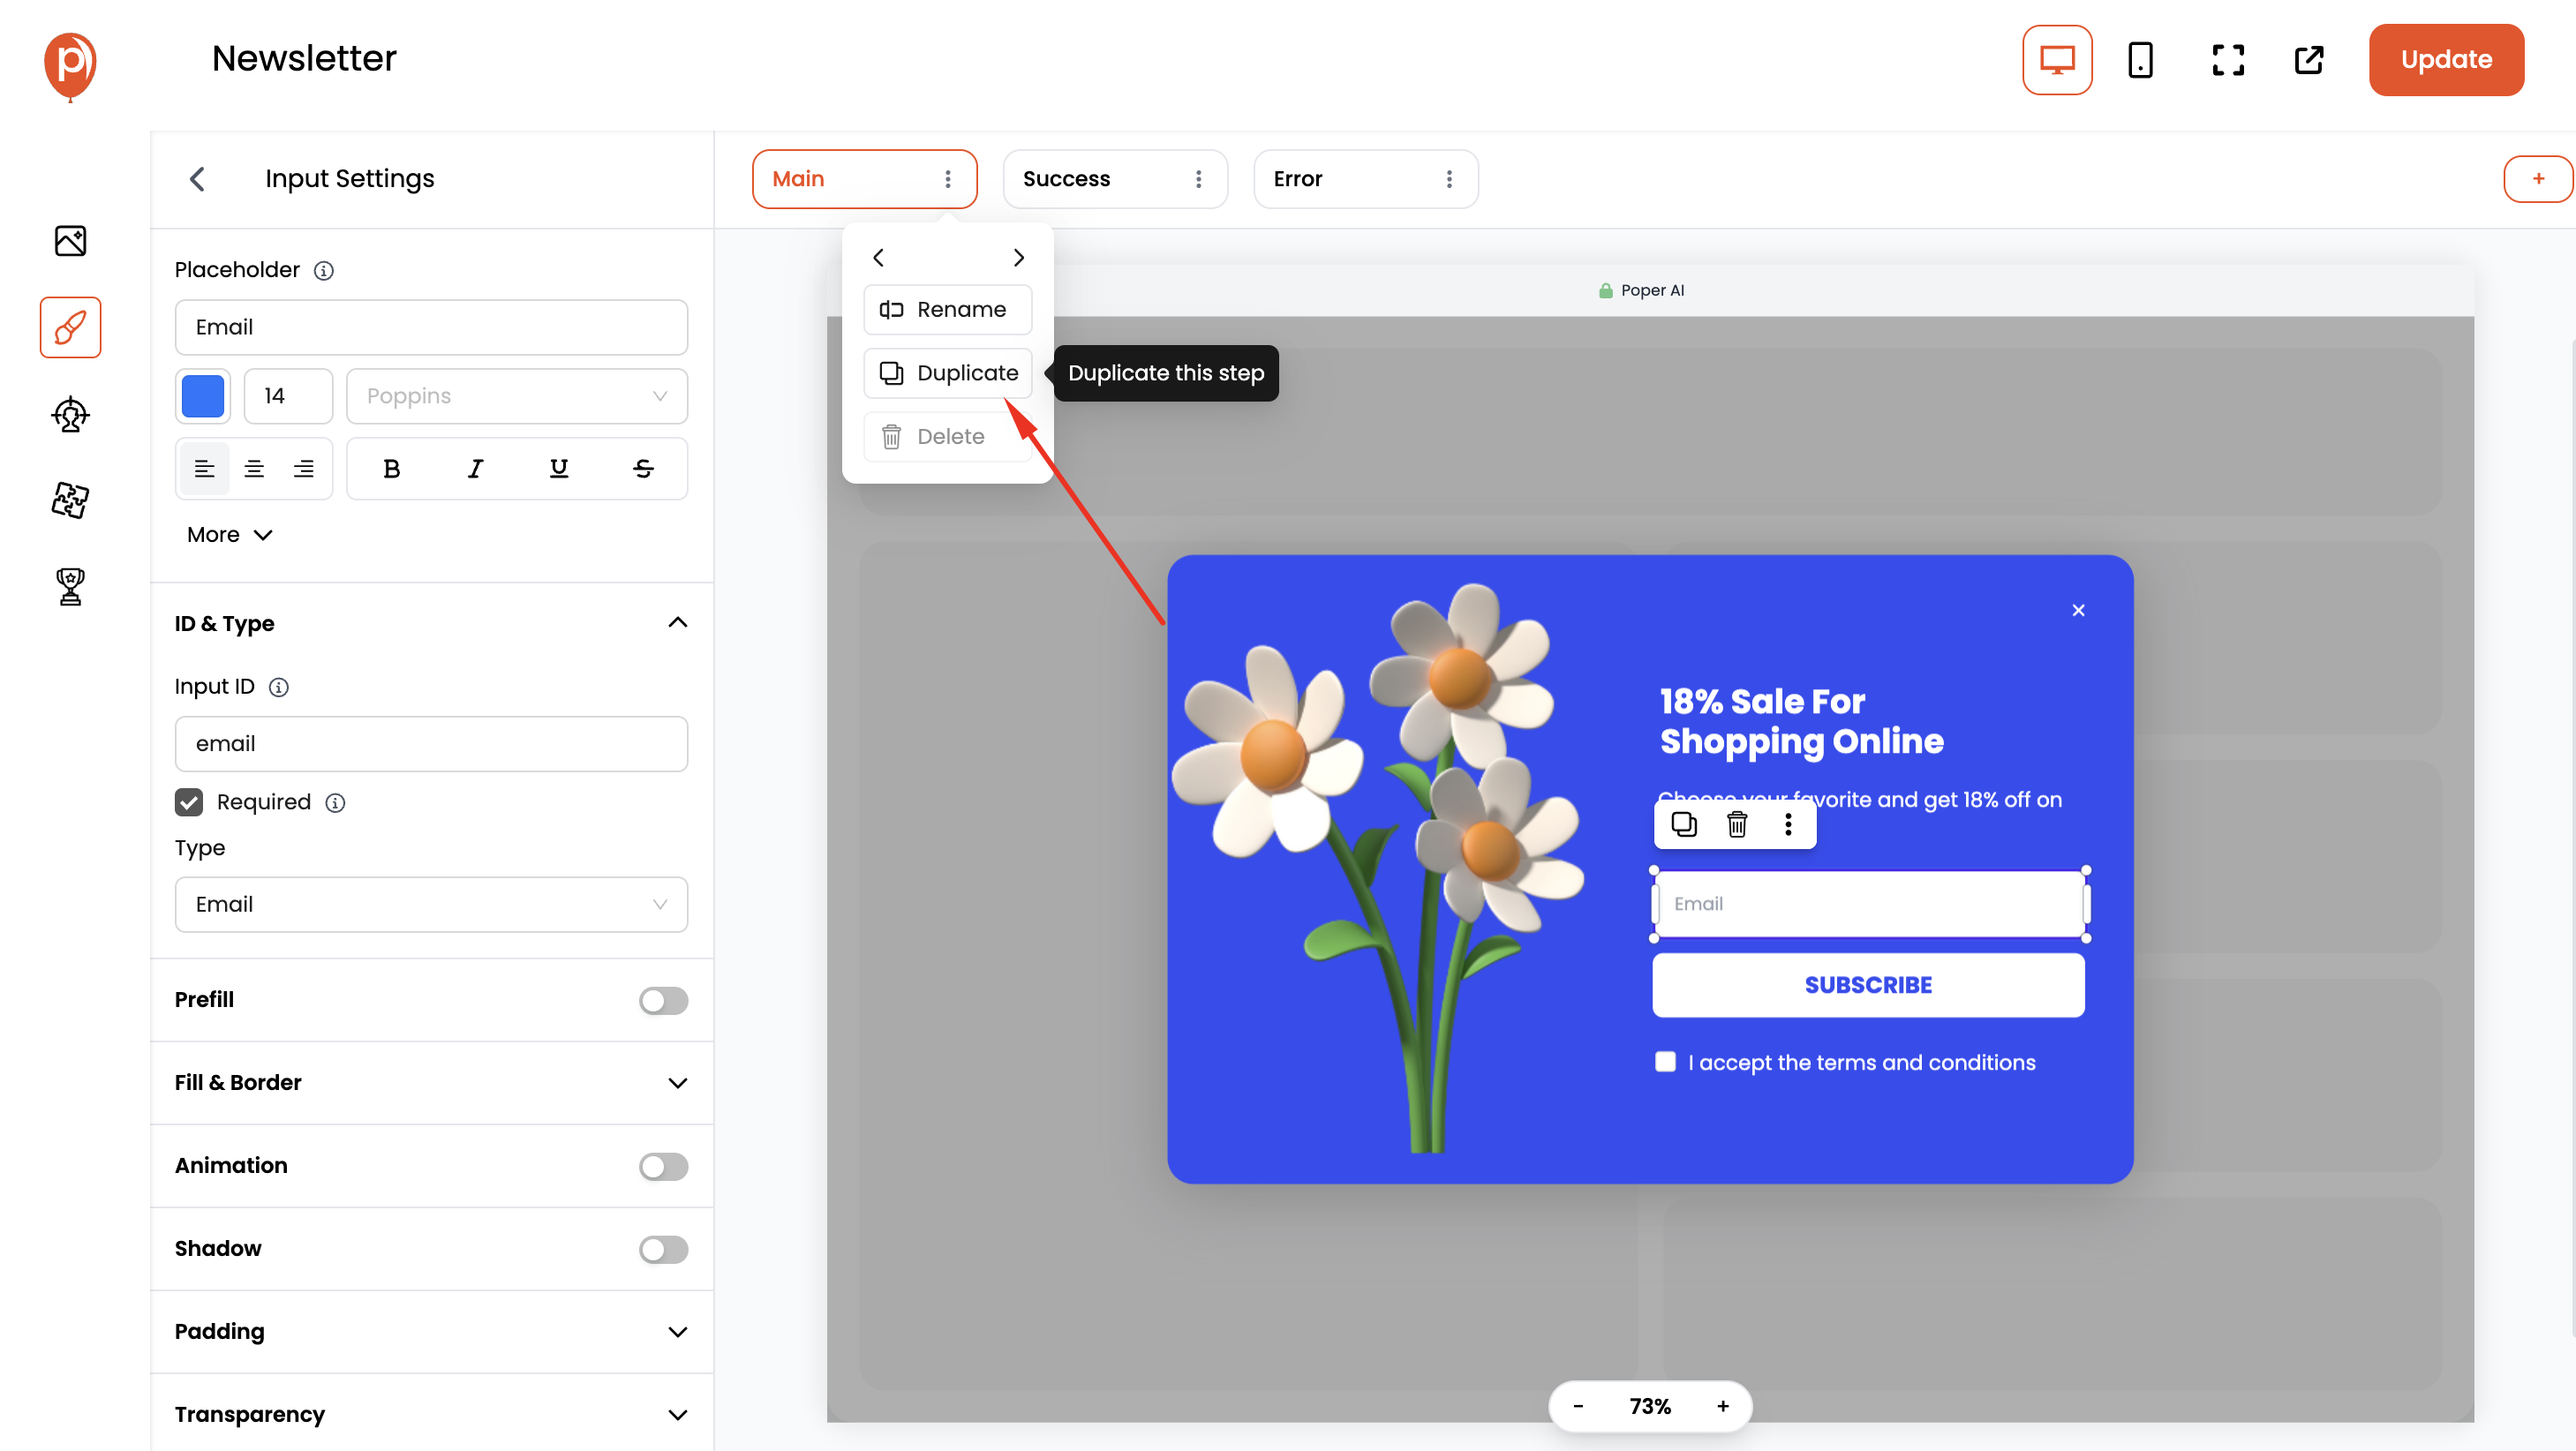
Hover over the three dots on the right side of the "Main" section in the steps bar. A dropdown menu will appear. Click on "Duplicate" to create a copy of this step.
Rename the Step: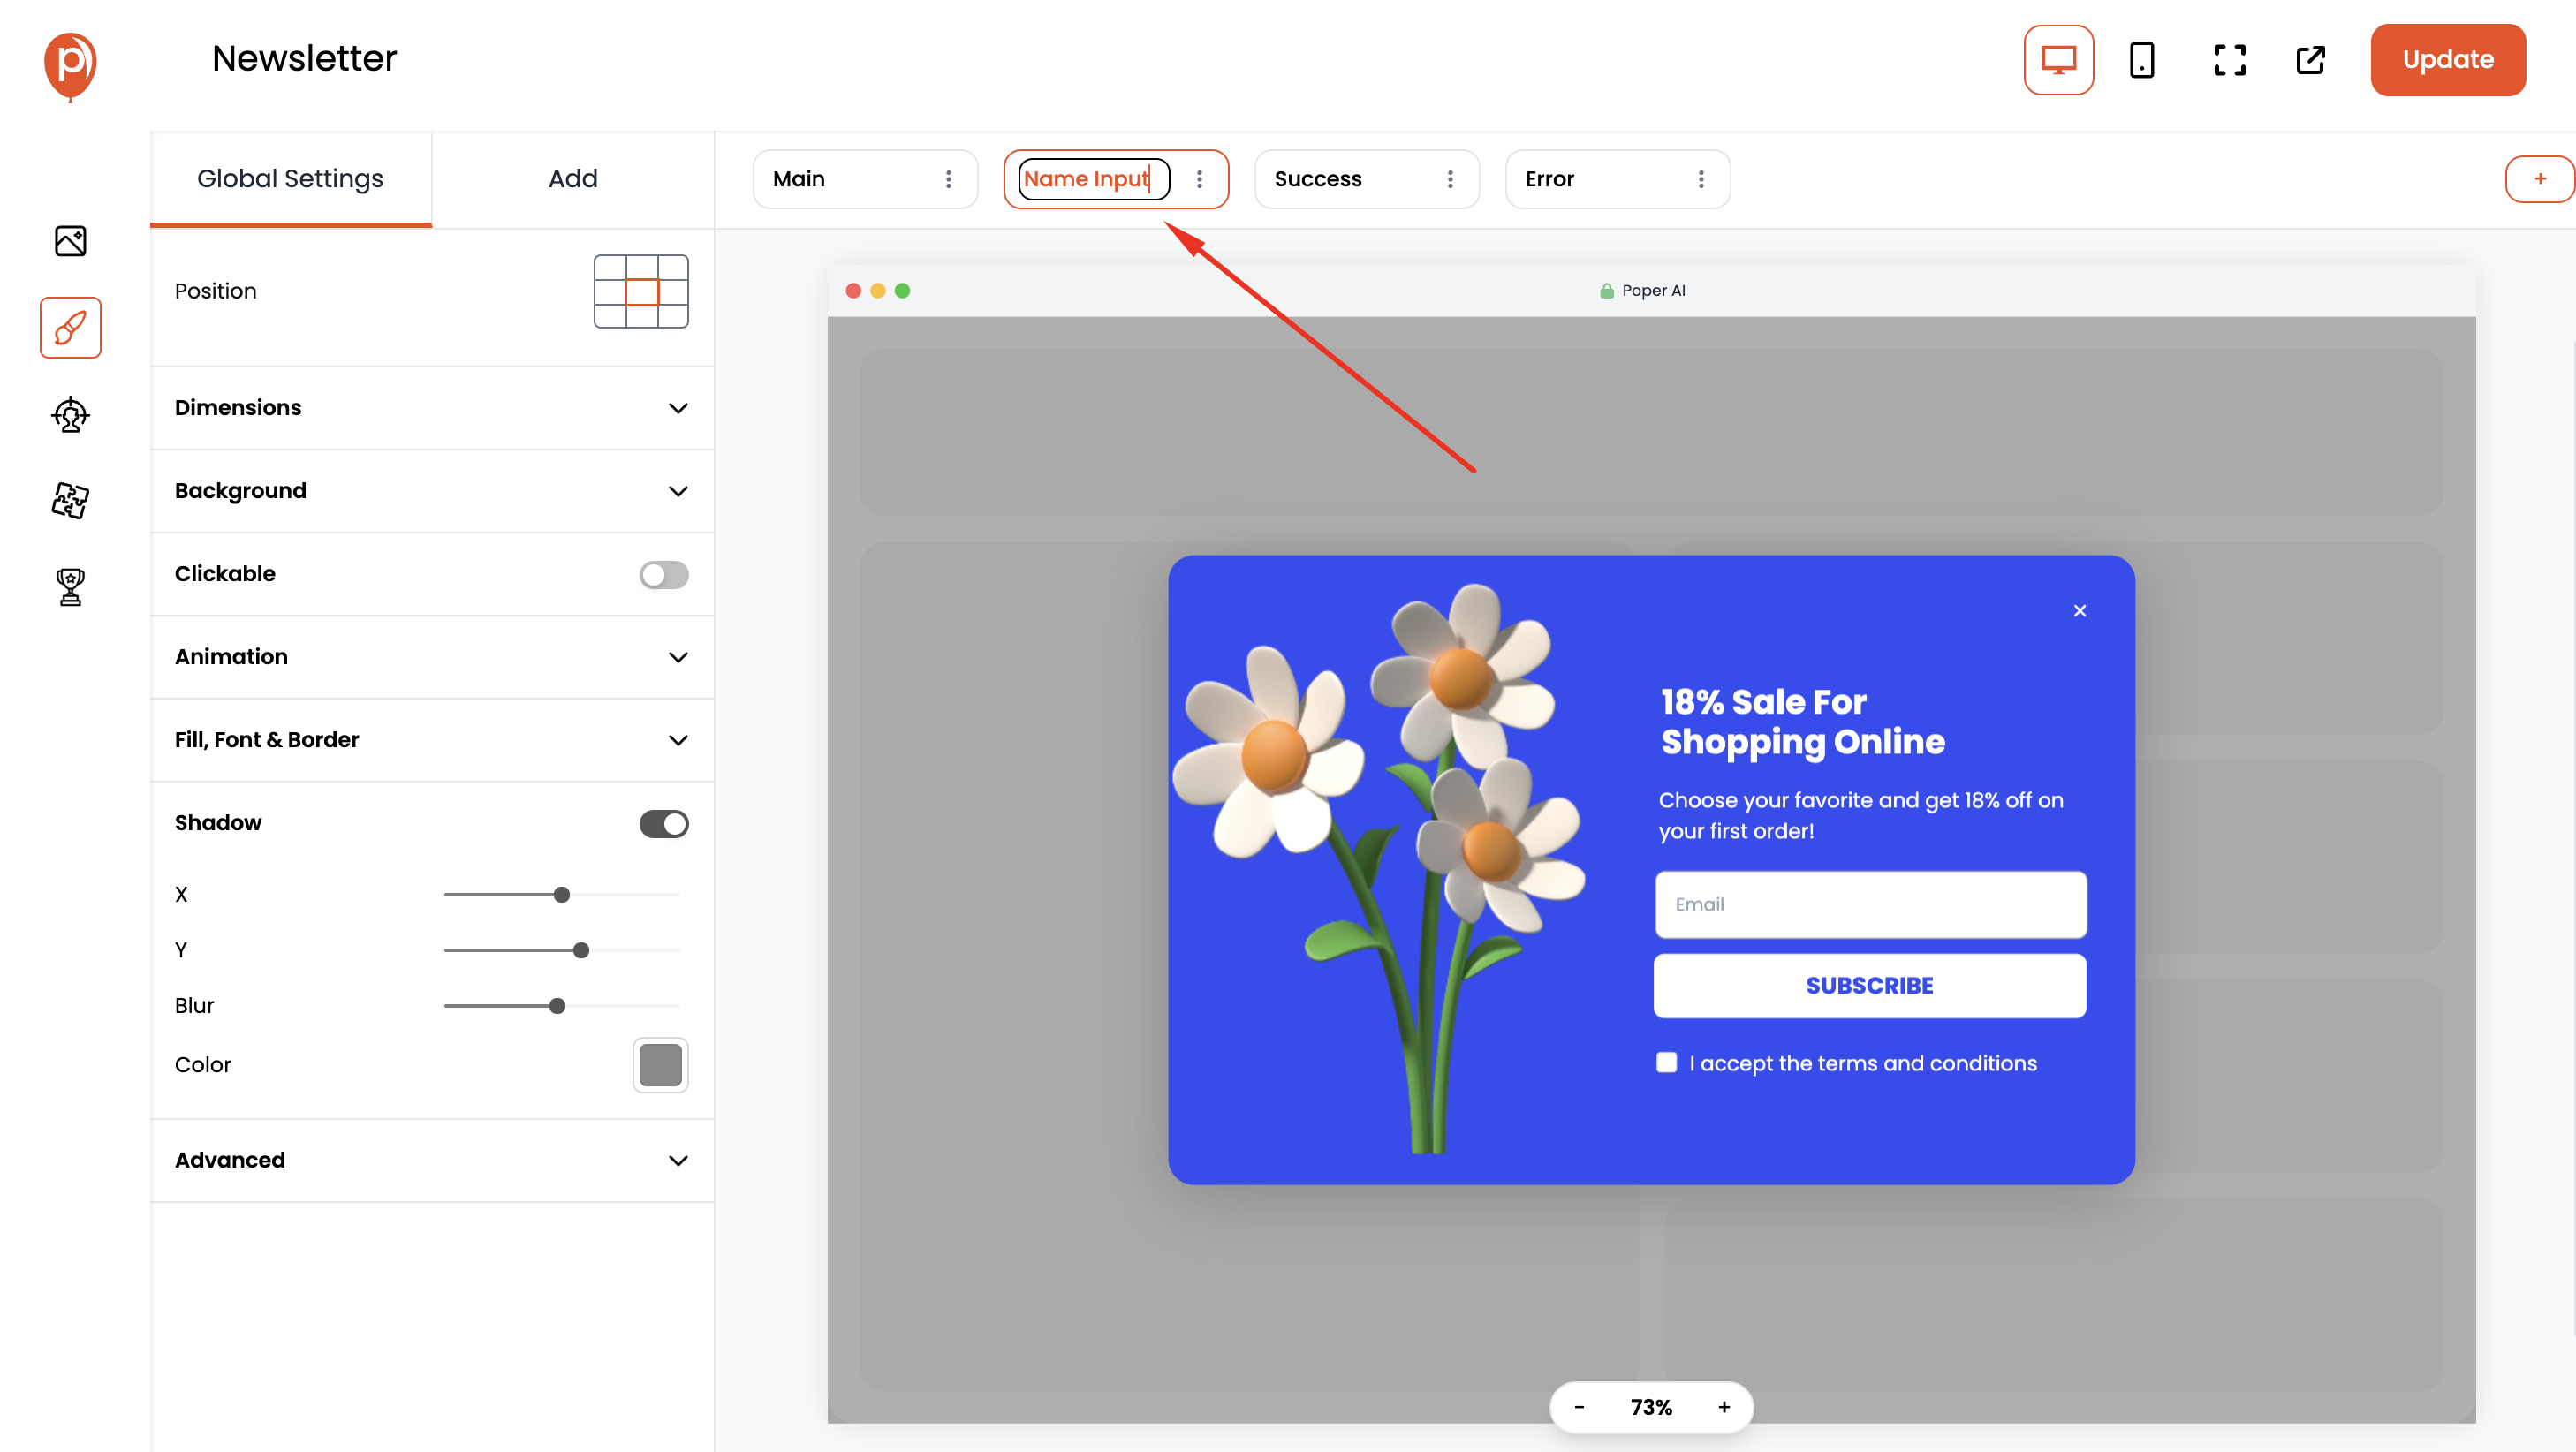
Double-click on the name "Step 2" in the steps bar and rename it to something descriptive, like "Name Input." This clarifies the purpose of this step.
Design the Name Step: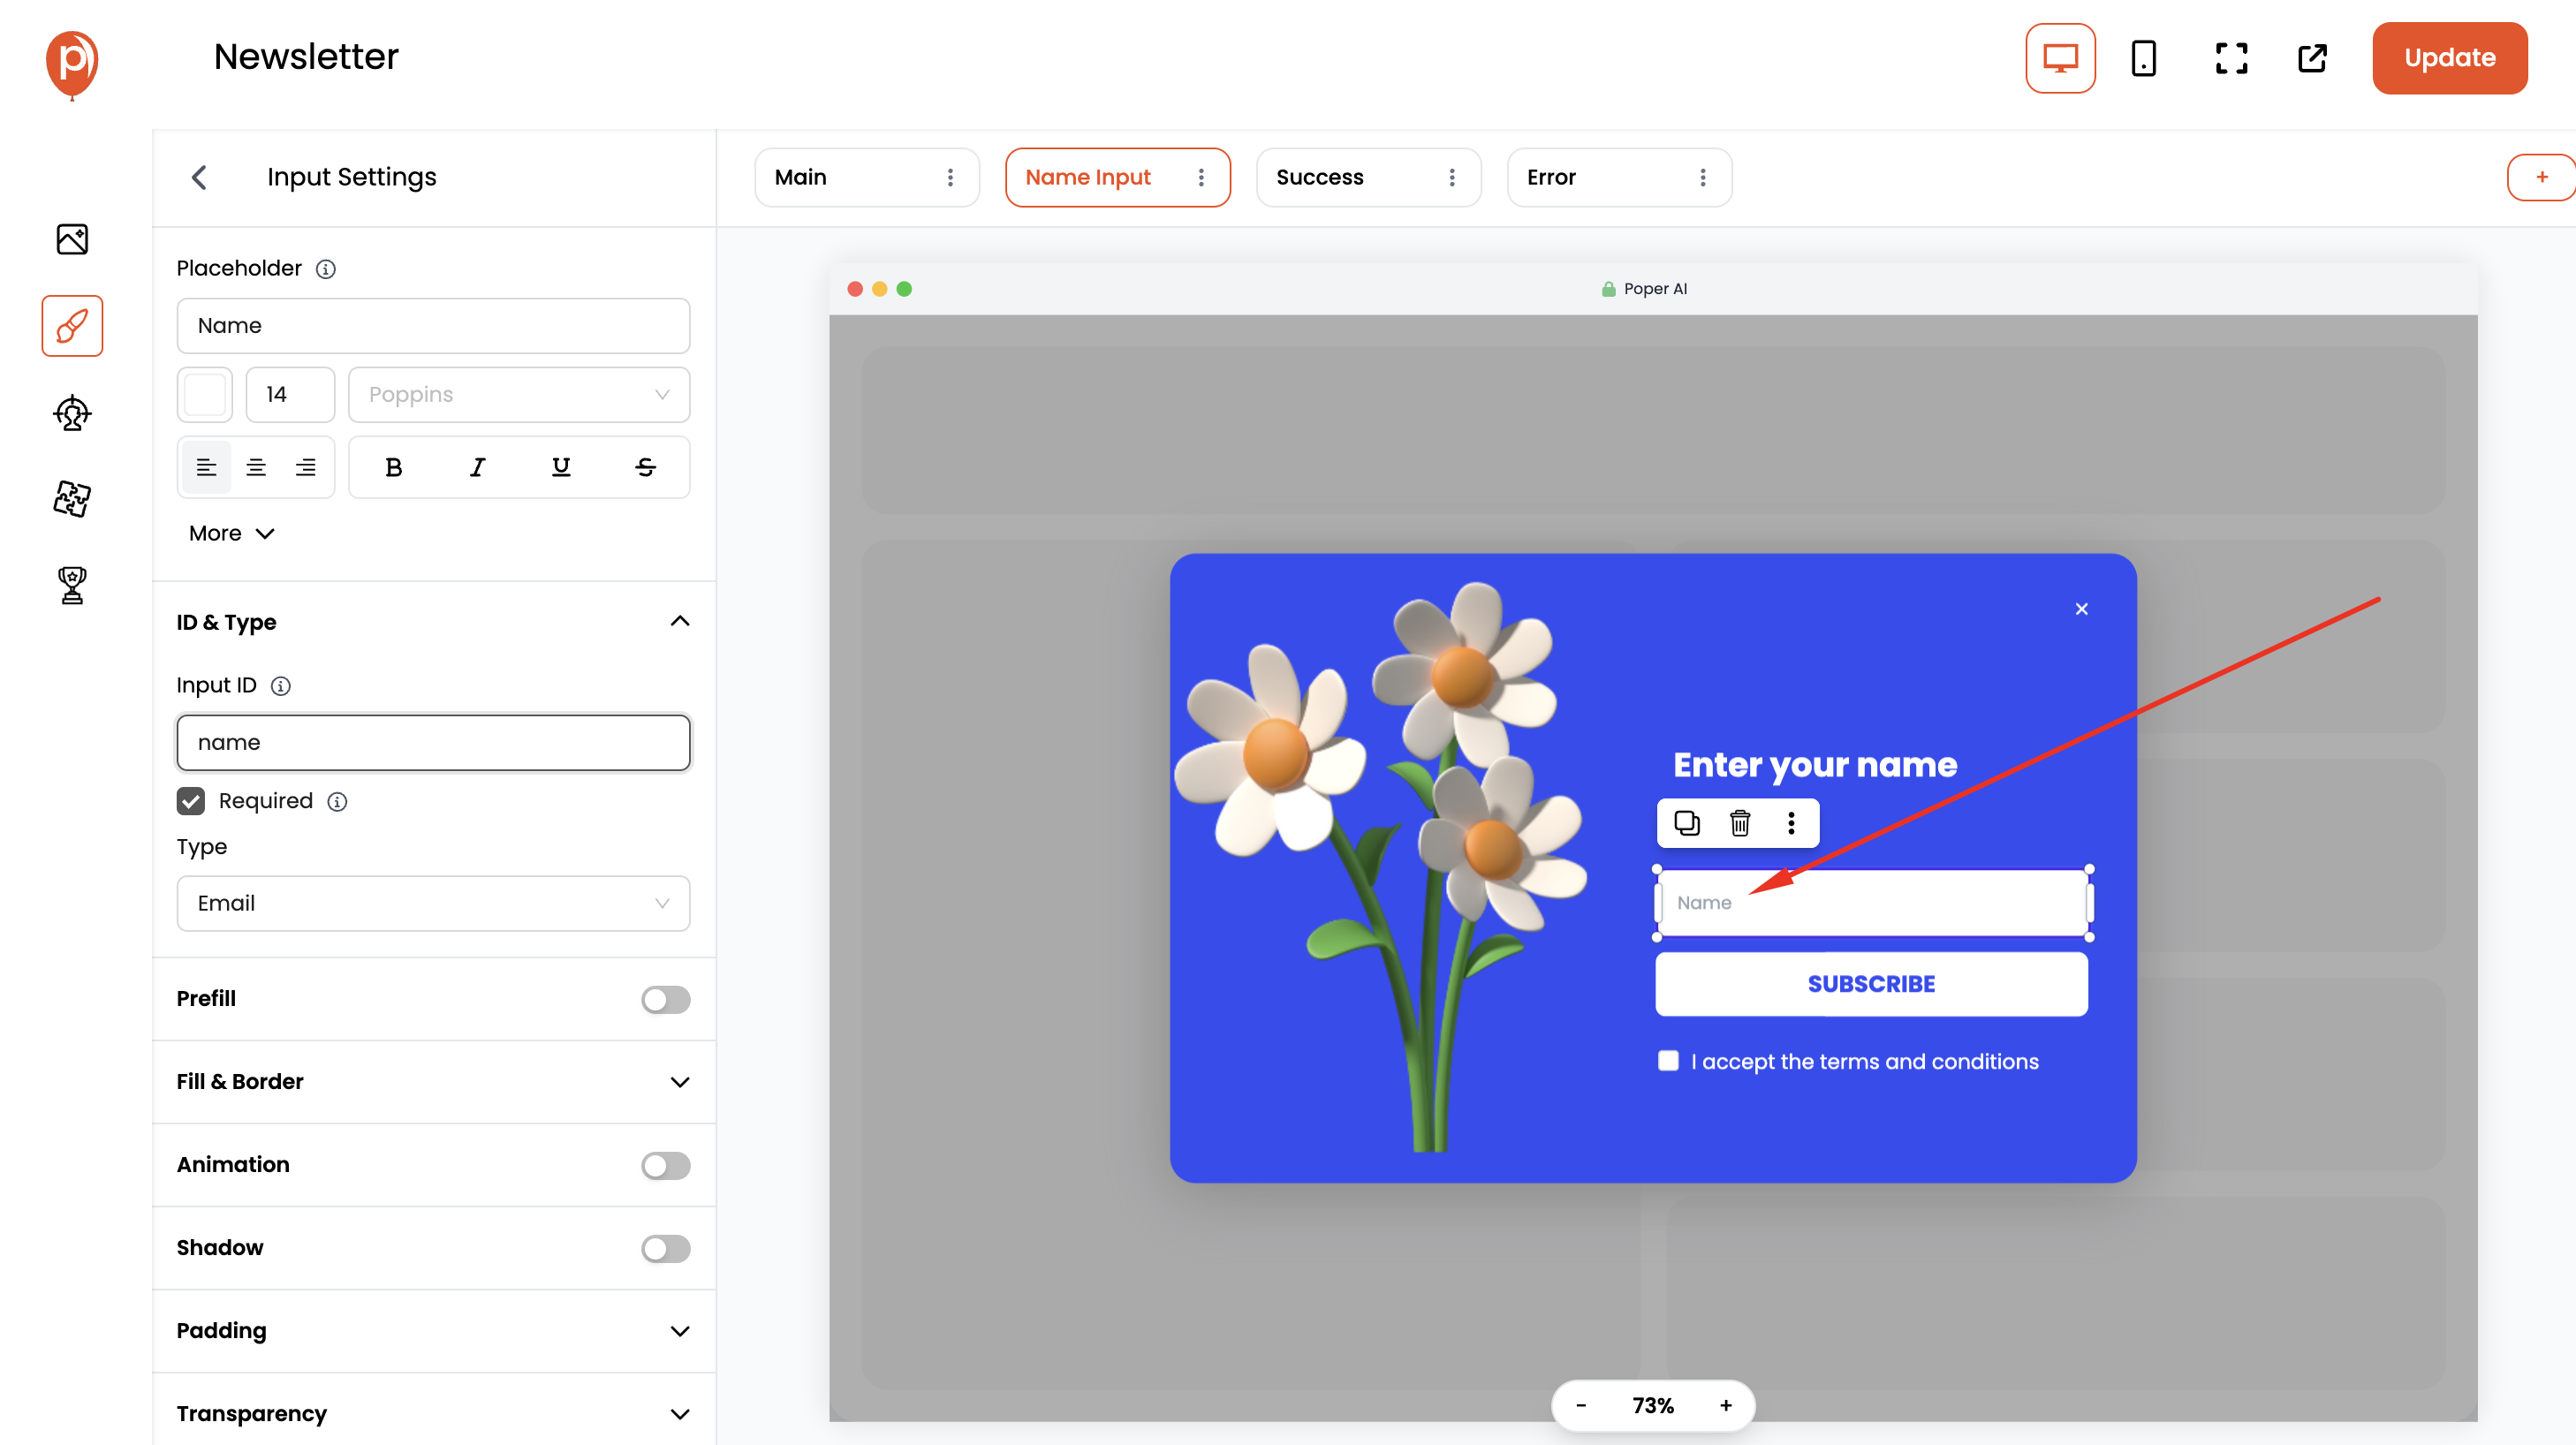
Utilize Poper's editing tools to style the "Name Input" step according to your preferences. You can change the background color, font styles, and other visual elements to match your overall popup theme.
Remove Unnecessary Elements:
Since this step focuses on name collection, you can remove the email input field you previously added.
Add Name Input:
Now, incorporate a name input field in the "Name Input" step using the available elements panel. This will allow visitors to enter their names.
Connecting the Steps:
Open the Main Step: 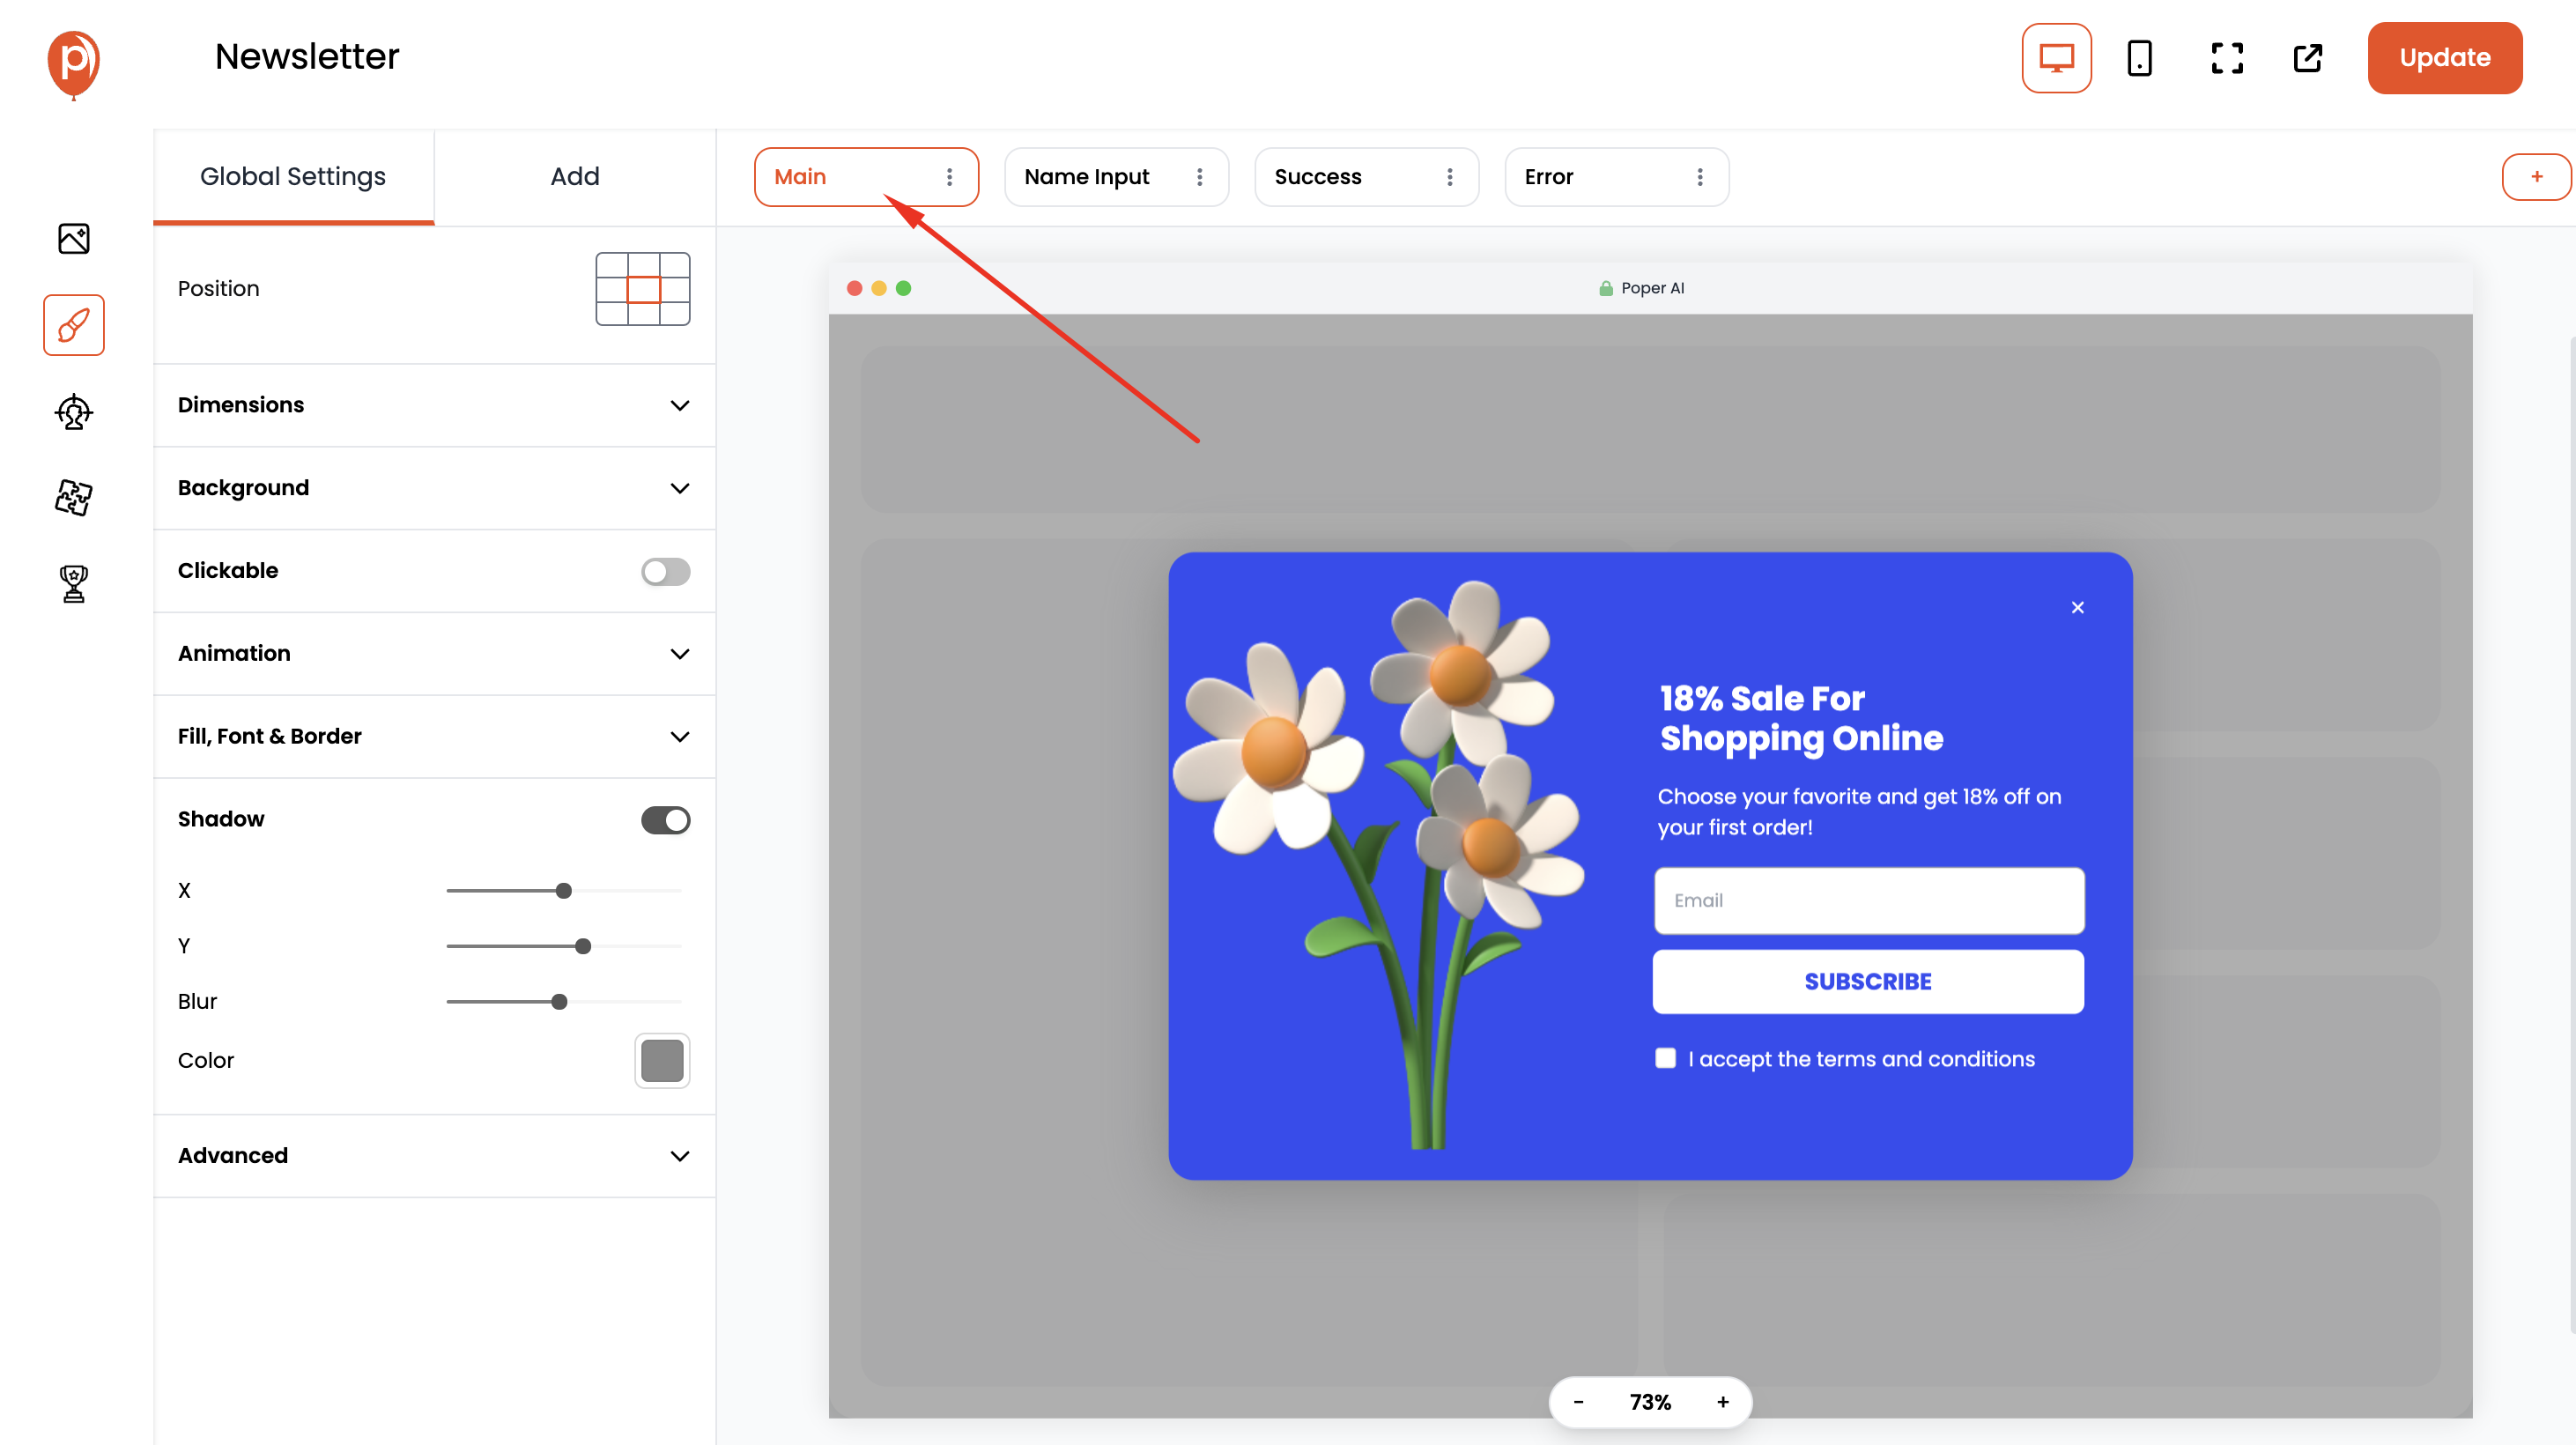
Click on "Main" in the steps bar to access its editing options.
Edit Call to Action Button: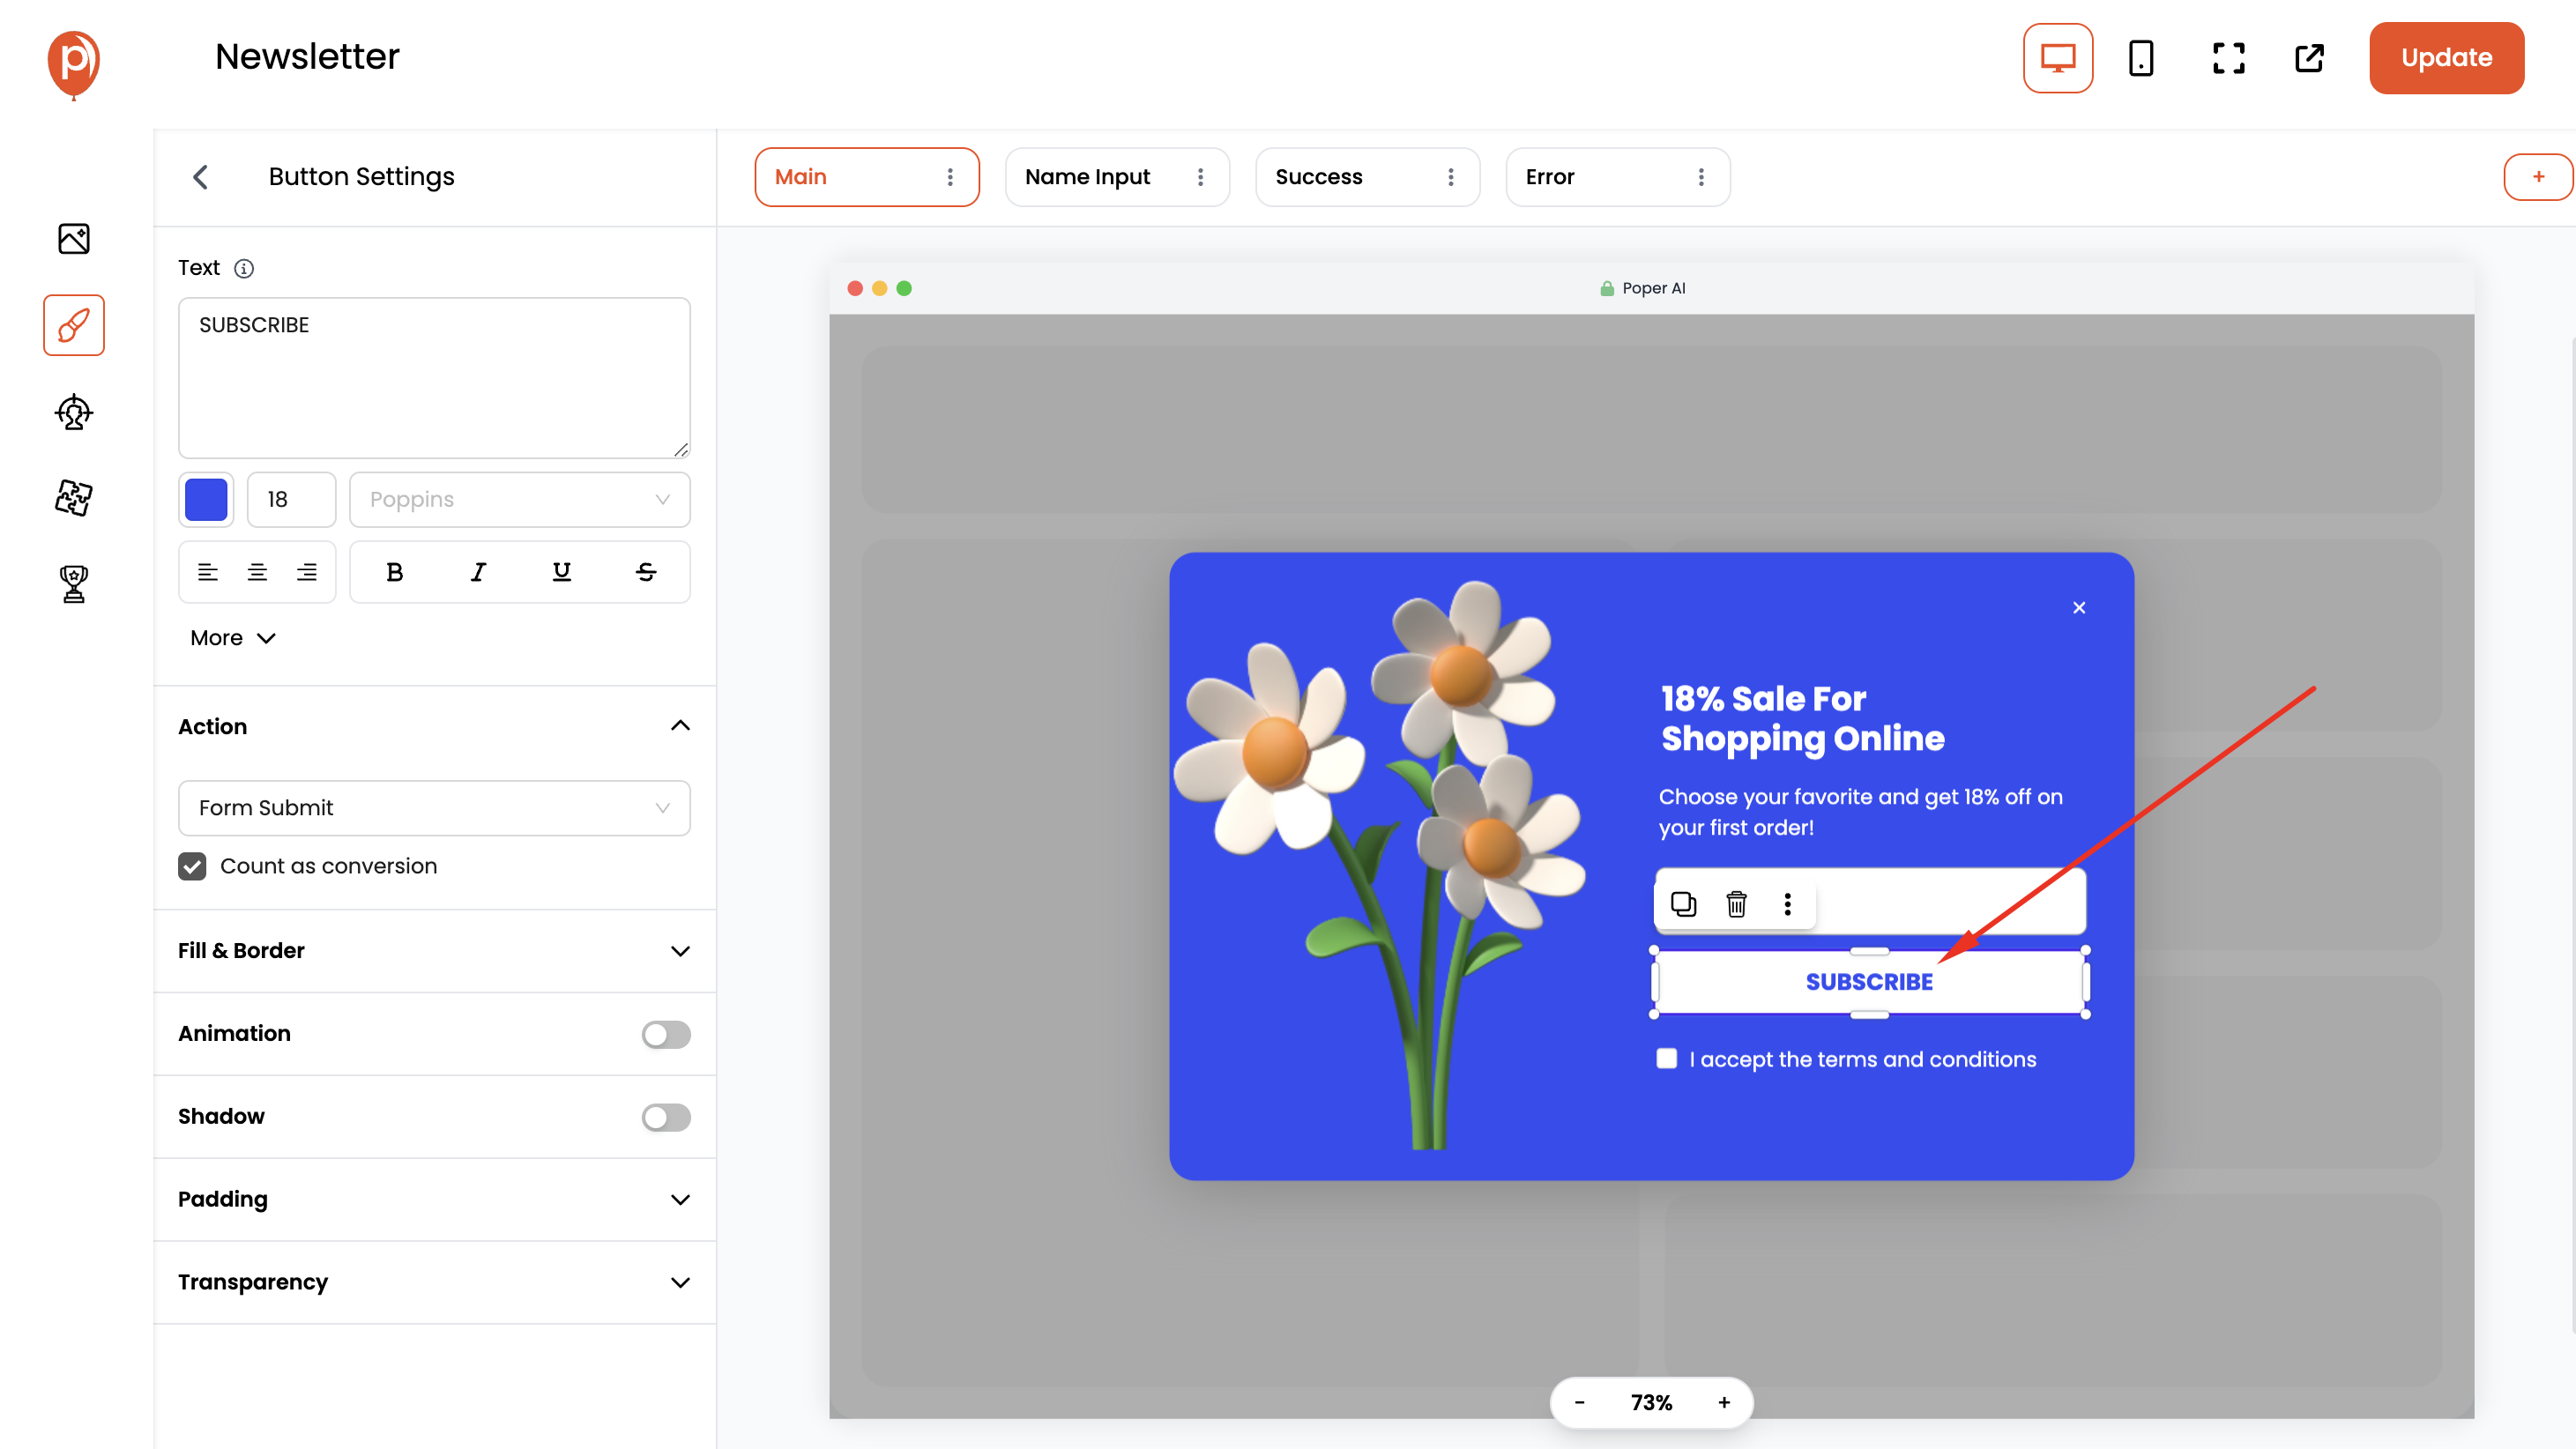
Locate the call to action button within your main step. This is typically the button visitors click after entering their email address.
Set Button Action:
In the button's settings, find the option labeled "Action." Change this action from the default setting to "Go to Step."
Select Next Step:
A dropdown menu will appear under "Go to Step." Select the name you assigned to your second step, which should be "Name Input" in this case. This ensures that clicking the button in your main step smoothly transitions visitors to the name input step.
Congratulations! You've successfully created a two-step popup in Poper. Remember, you can add more steps and customize button actions to create even more engaging multi-step popup experiences for your audience.
Additional Tips:
- Tailor the content of each step to guide visitors through the process.
- Experiment with different button designs and action combinations to optimize your popup's conversion rate.
By following these steps and incorporating these tips, you can leverage Poper's multi-step functionality to create effective and engaging popups that capture valuable information from your visitors.
Related Articles
How to create a new Campaign
Poper empowers you to create and manage multiple campaigns for your website. This guide will walk you through the process of creating a new campaign and adding various elements like popups, widgets, and videos. Creating a New Campaign: There are two ...How to create a Widget in Poper from Scratch?
Teasers, also known as nudges, are small, non-intrusive popups that encourage users to interact without disrupting their experience. Follow this guide to add and configure teasers in your Poper popups. Steps to Add Teasers/Nudges to Popups Step 1: ...How to edit Form Success / Error Steps in Poper (Thank You message)
Poper allows you to customize the user experience after someone submits your popup form. This guide will show you how to edit the "Form Success" and "Form Error" steps, enabling you to create clear and informative messages for your visitors. ...How to create Embed (In Page) Campaigns in Poper
Poper's embed feature allows you to strategically place popups or widgets within specific sections of your web pages. This guide will walk you through the process of creating embeds and customizing their placement. Steps to Create an Embed: Access ...How to create Age Verification Popups?
Ensure compliance and protect your content with Age Verification Popups in Poper. Follow these steps to create and customize your Age Verification Popup: How to Create Age Verification Popups: Access Dashboard: Log in to your Poper dashboard and ...