HubSpot Integration
This guide will walk you through integrating Poper, your drag-and- drop popup builder, with HubSpot, a powerful CRM platform. This integration allows you to seamlessly transfer lead data captured through your Poper popups directly into your HubSpot account, streamlining your lead management process.
Benefits of Integration:
- Automated Lead Capture: Eliminate manual data entry by automatically sending leads from Poper to your HubSpot CRM.
- Centralized Lead Management: Keep all your leads organized and accessible within HubSpot.
- Enhanced Data Analysis: Gain valuable insights into your leads by analyzing their data in HubSpot's robust reporting features.
Prerequisites:
- A Poper account with an active popup campaign.
- A HubSpot account with appropriate permissions to add contacts.
Steps:
Access Your Poper Popup:
Log in to your Poper dashboard and navigate to the specific popup you want to integrate with HubSpot.
Open the Integrations Menu:
On the left-hand side navigation bar, locate the "Integrations" tab (represented by a link icon) and click on it.
Find the HubSpot Integration:
Within the search bar of the integrations menu, type in "HubSpot" and select the option that corresponds with the HubSpot logo.
Name Your Integration:
Provide a clear and descriptive name for your integration (e.g., "Poper Lead Capture").Click the "Next" button to proceed.
Connect to HubSpot:
A new window will pop up prompting you to sign in to your HubSpot account if you haven't already done so. Enter your credentials and log in.
Choose Your HubSpot Account:
After successful login, you'll be presented with a list of your HubSpot accounts.Select the specific account you want to integrate with Poper and click "Choose Account."
Map Your Popup Fields:
If the connection is established successfully, you'll be directed to a mapping screen.Here, you'll need to match the data points captured by your Poper popup form fields with the corresponding fields in your HubSpot contact properties. Use the dropdown menus to select the appropriate platform key (HubSpot field) for each input field in your popup.
Add Custom Fields (Optional): 
If your Poper popup captures data that doesn't have a direct equivalent in HubSpot's standard contact properties, you can add custom fields. Click the "Add Another Attribute" button and define the custom field name in HubSpot to match the corresponding field in your Poper form.
Complete the Integration: 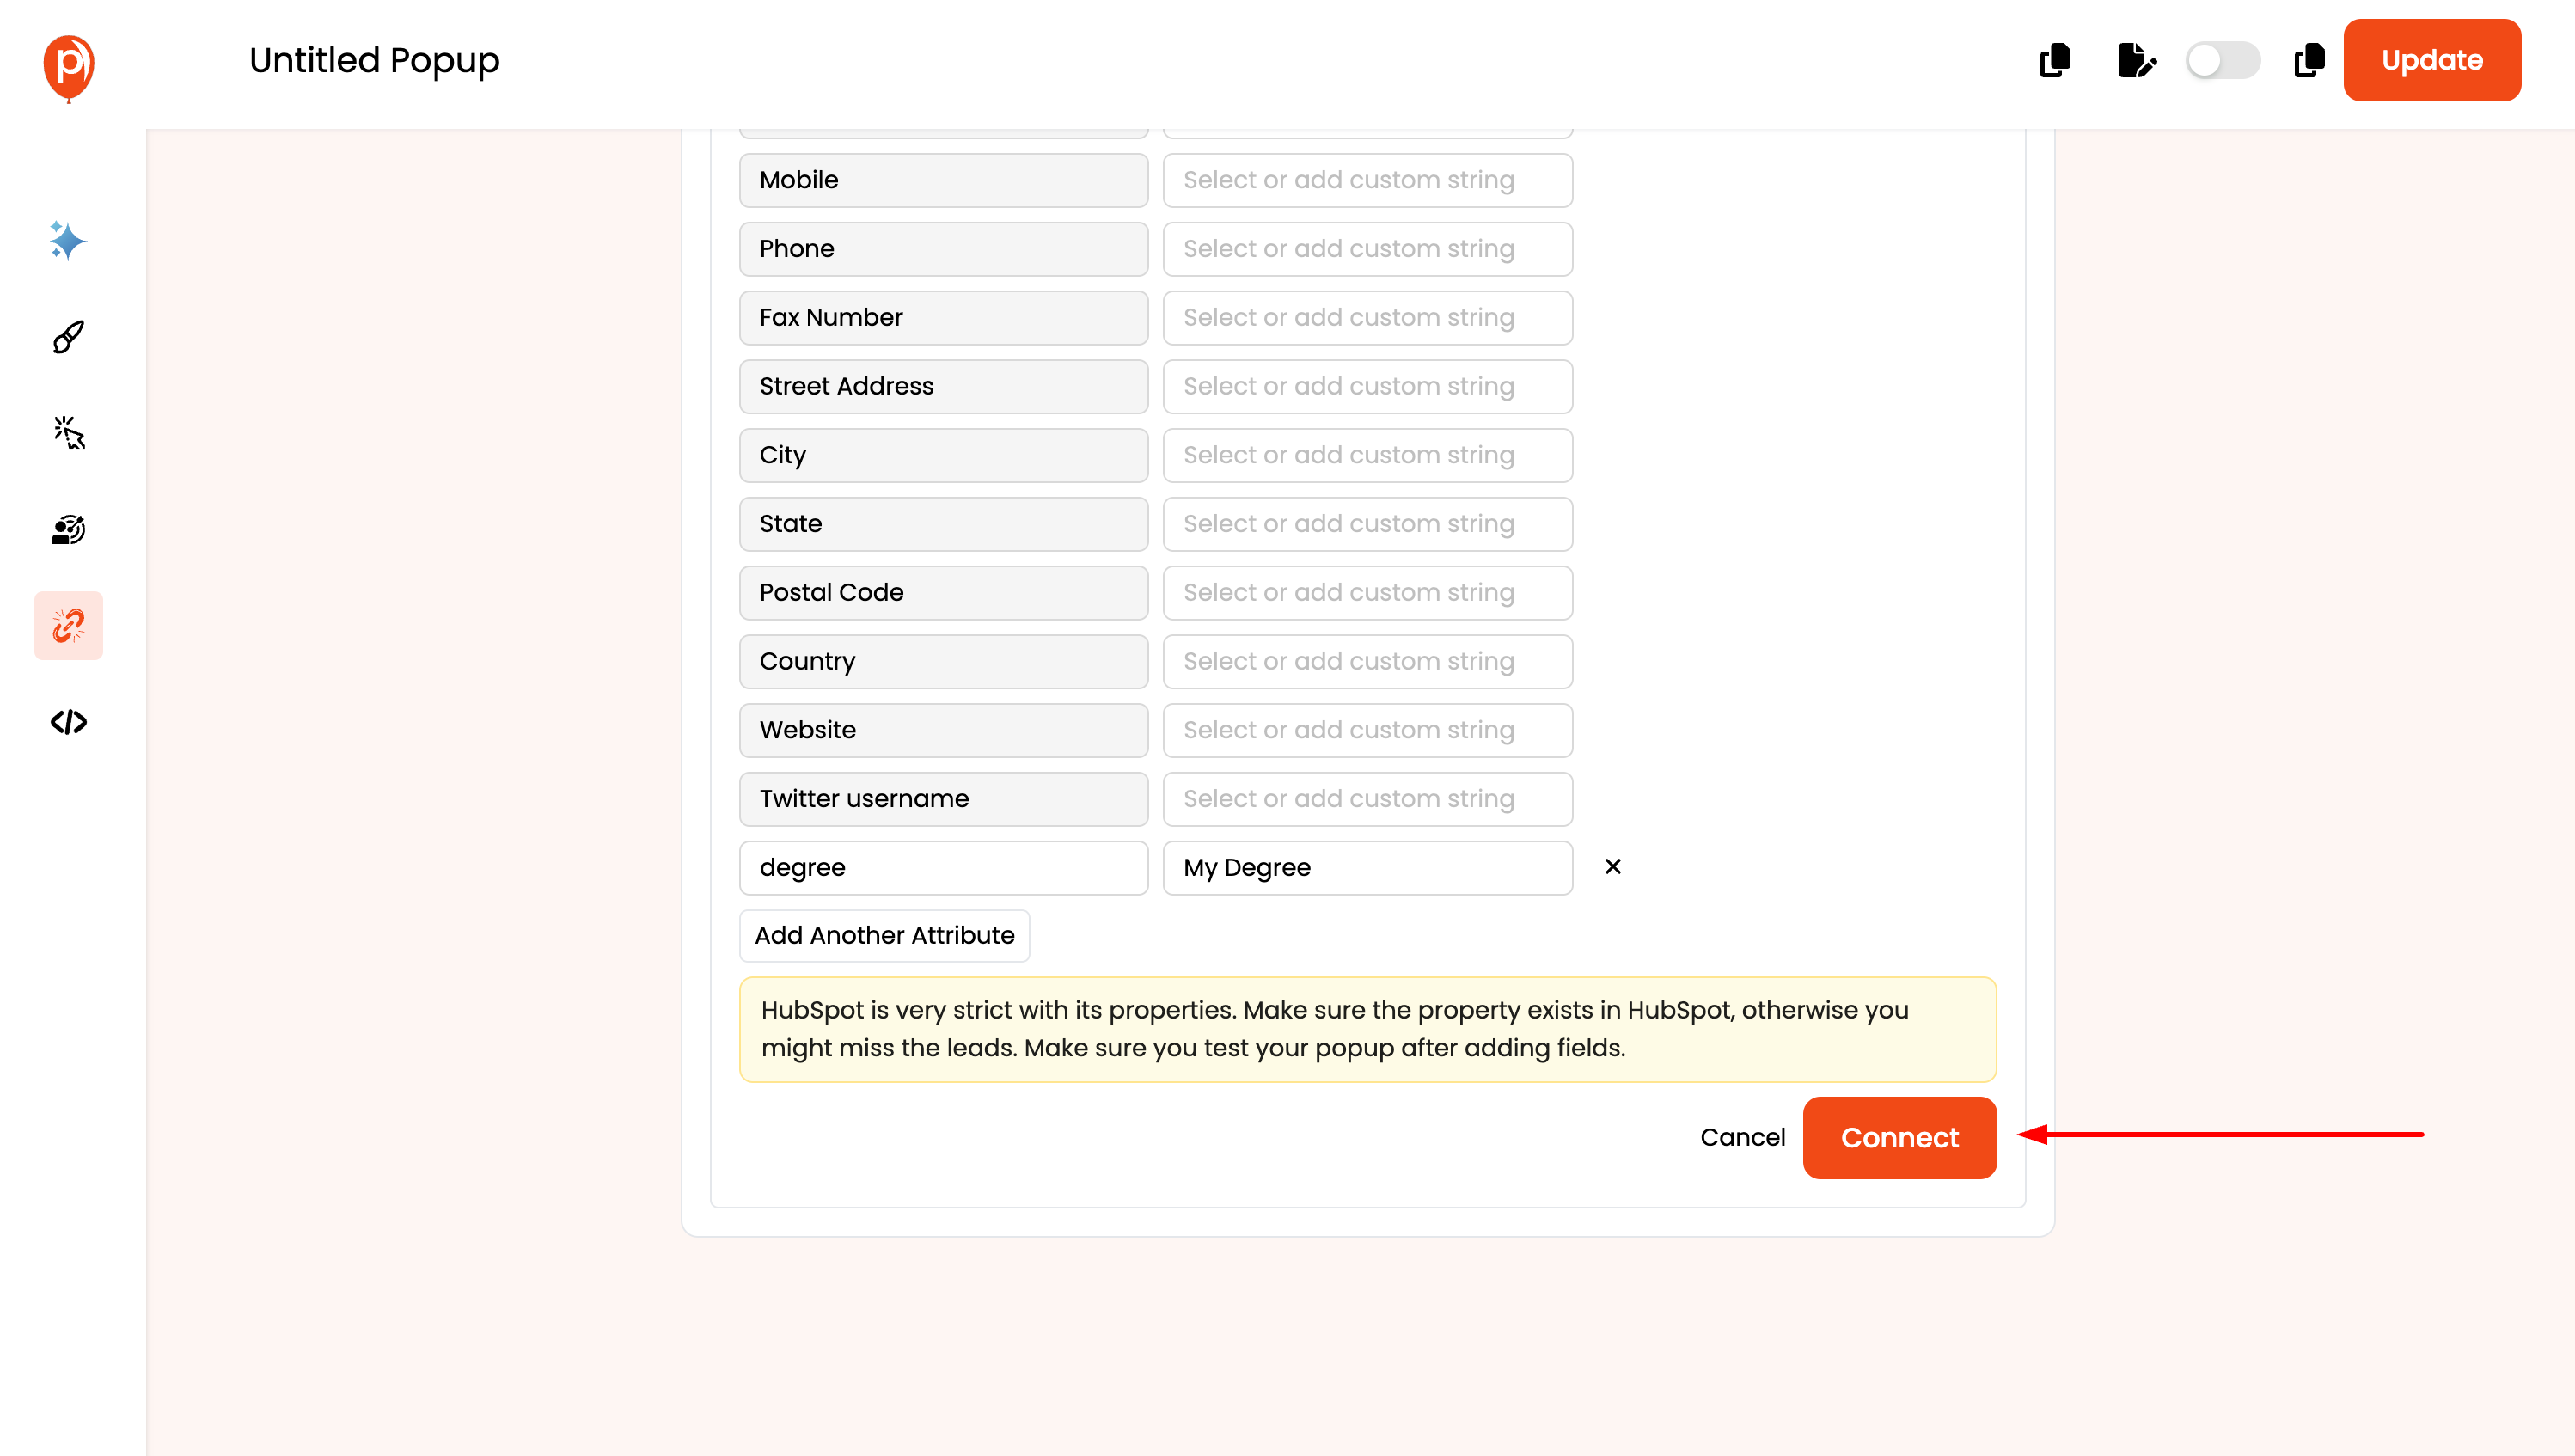
Once you've finished mapping all the fields, click the "Connect" button. If the configuration is successful, you'll see a confirmation message indicating a successful integration.
Test the Integration: 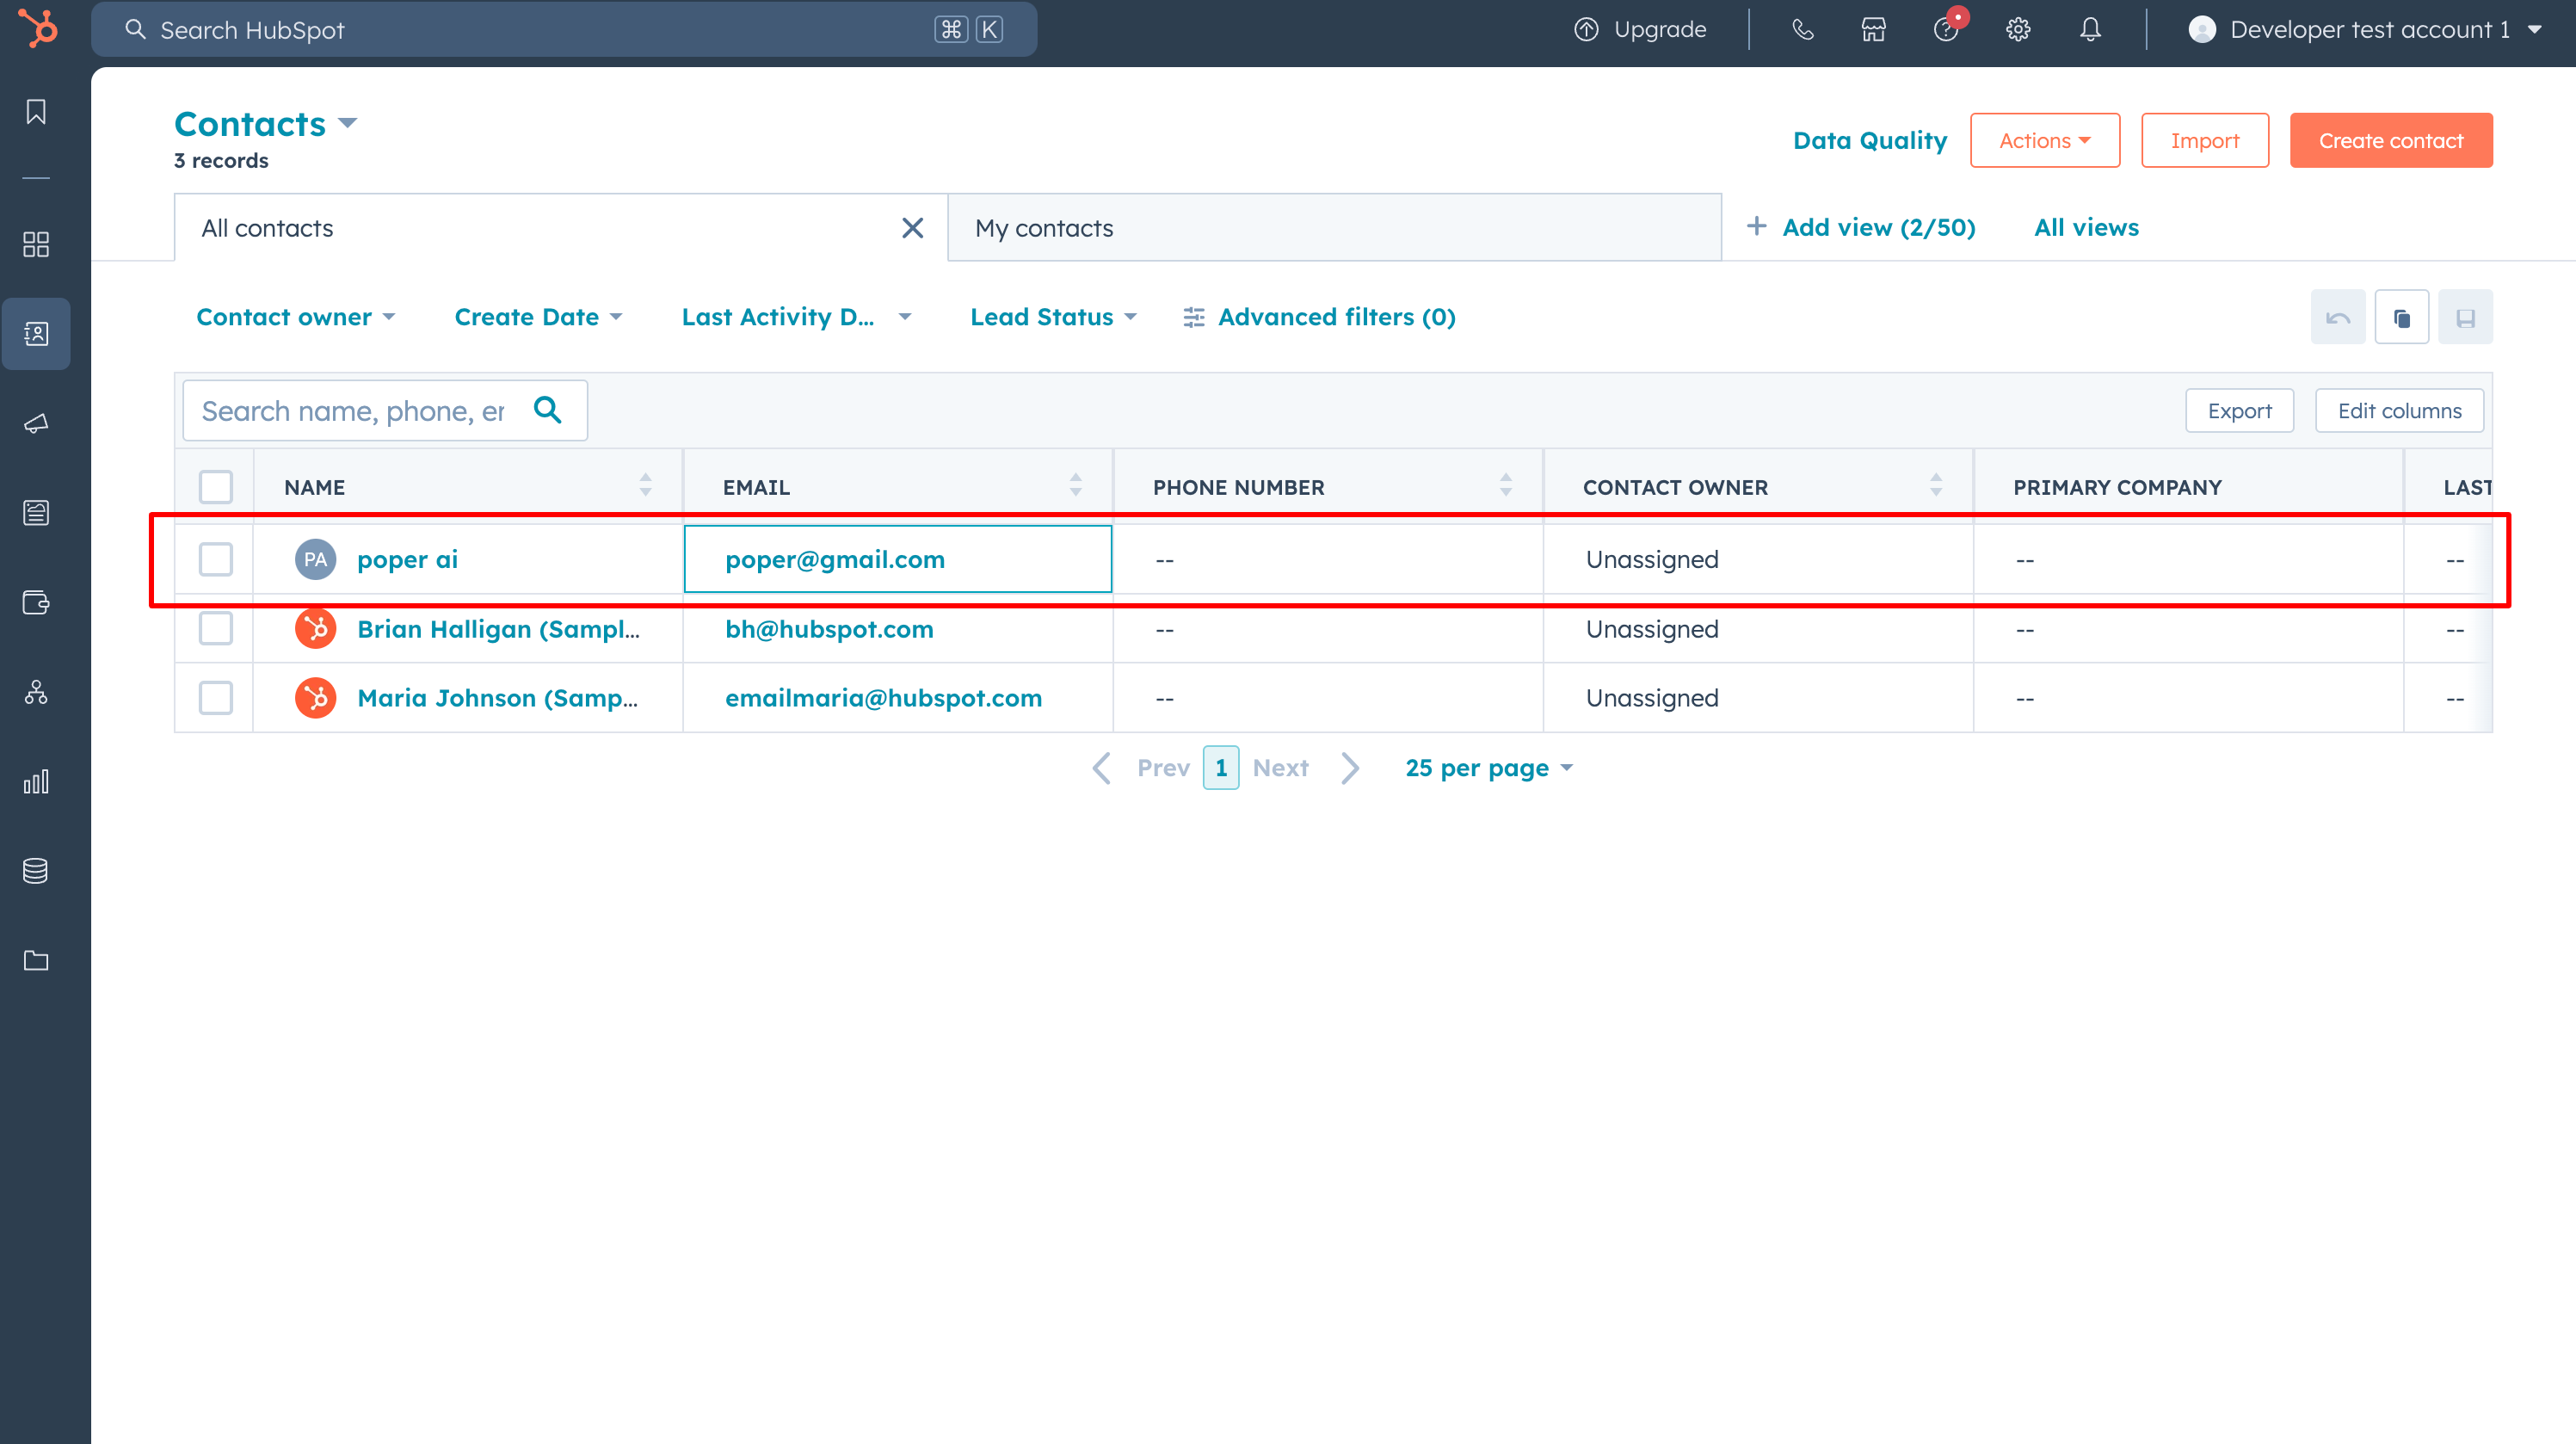
To ensure everything works as expected, submit a test lead through your Poper popup. The data from the test lead should appear in your HubSpot contact list within a short period.
Congratulations! You've successfully integrated Poper with HubSpot. Now, all leads captured through your Poper popups will be automatically added as contacts in your HubSpot CRM.
Additional Tips:
- Ensure the field names and data types in your Poper popup form match the corresponding properties in HubSpot for seamless data transfer.
- Regularly review and update your integration settings, especially if you make changes to your popup form fields or HubSpot contact properties.
- Leverage HubSpot's marketing automation features to nurture leads captured through your Poper popups and convert them into valuable customers.
By following these steps, you can bridge the gap between your lead capture efforts and your CRM system, allowing you to manage your leads more effectively and efficiently.
Related Articles
Klaviyo Integration
Effortlessly manage your email marketing campaigns by integrating Klaviyo with Poper. Follow these simple steps to set up the integration: How to Integrate Klaviyo in Poper: Edit Popup: Navigate to the Poper dashboard and locate the popup where you ...Simplero Integration
Effortlessly streamline your lead management process by integrating Simplero with Poper. Follow these straightforward steps to set up the integration: How to Integrate Simplero in Poper: Edit Popup: Access the Poper dashboard and navigate to the ...Slack Integration
Integrating Poper with Slack allows you to receive real-time notifications about new leads directly in your Slack channels. This guide will walk you through the process of setting up Slack integration for your popups in Poper. Steps to Integrate ...Mailerlite Integration
Effortlessly manage your subscribers and email campaigns by integrating Mailerlite with Poper. Follow these straightforward steps to set up the integration: How to Integrate Mailerlite in Poper: Edit Popup: Navigate to the Poper dashboard and locate ...Selzy Integration
Optimize your lead generation strategy by seamlessly integrating Selzy with Poper. Follow these straightforward steps to set up the integration: How to Integrate Selzy in Poper: Edit Popup: Navigate to the Poper dashboard and locate the popup where ...